Deploy VCF 9 using VCF Installer
May 25, 2026 | Homelab, VCF, VCF 9, VCF Installer, VMware | No Comments
Pre-Reqs
This portion assumes that you already have set up and linked your VCF installer with an offline\online depot.
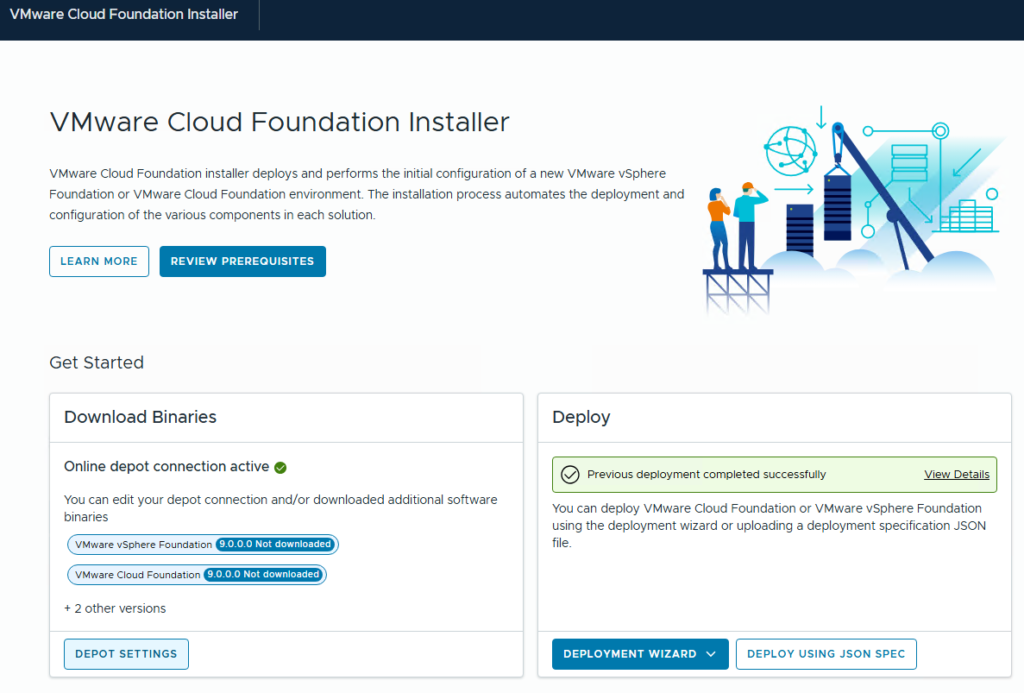
Deploy VCF installer
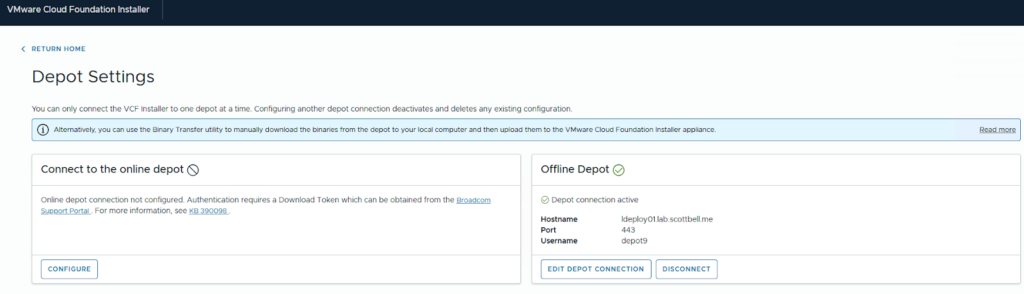
Setup VCF Installer with Offline Depot
Offline Depot/Binary Management for VCF
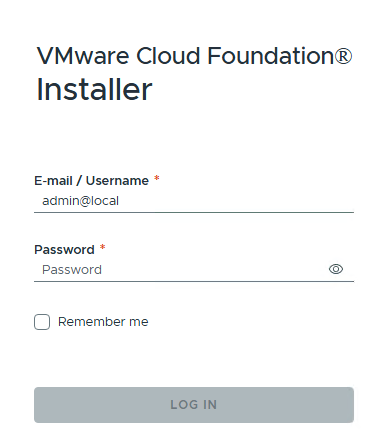
Login to your VCF Installer
When you login, make sure your Online\Offline Depot is still linked (shown by the Online Depot Connection active having a green dot)
Select Depot Settings to ensure your needed files have been downloaded
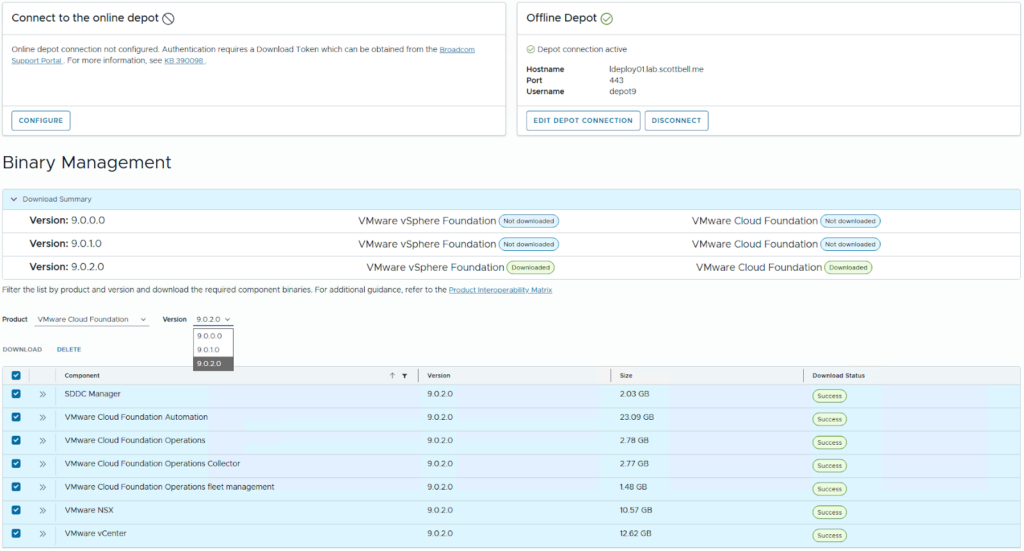
You will first see which depot your connected to, Offline in my case
Then under Binary Management you will see the versions and whether you have downloaded the files needed for VVF or VCF
Last is the actual files available for download, version, size and download status.
Use the drop down show to change versions to the version you plan to use
Check the top level or individual file blocks and then click Download to start downloading your files
Select Return Home once completed
Start a Deployment
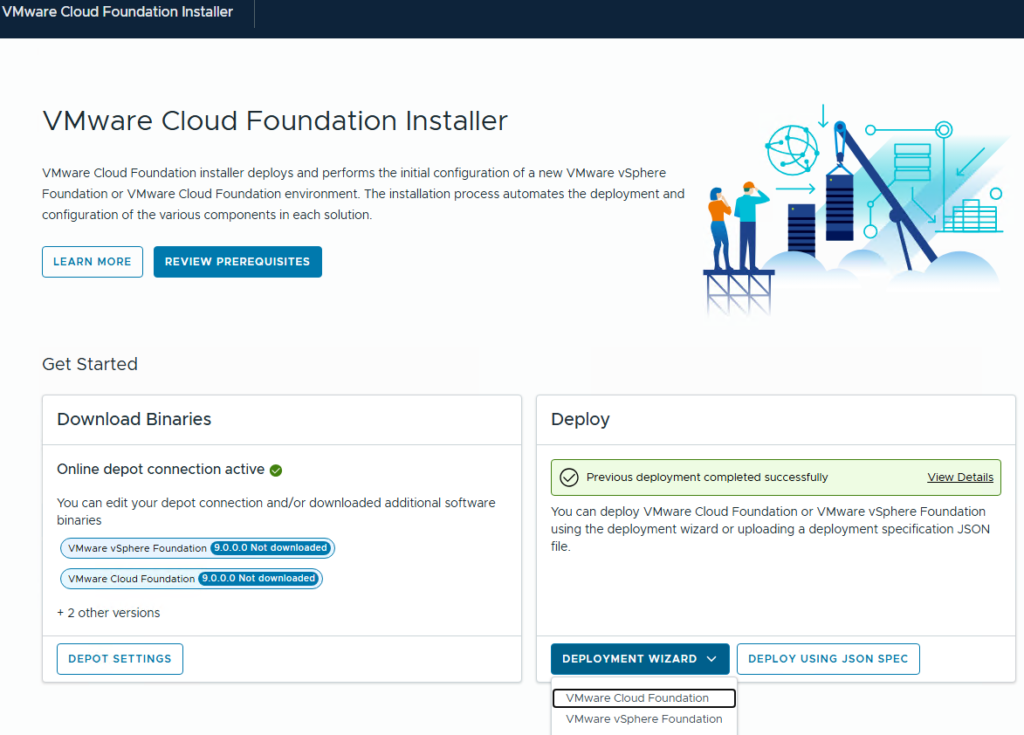
Select the Deployment Wizard drop down and then your intended version
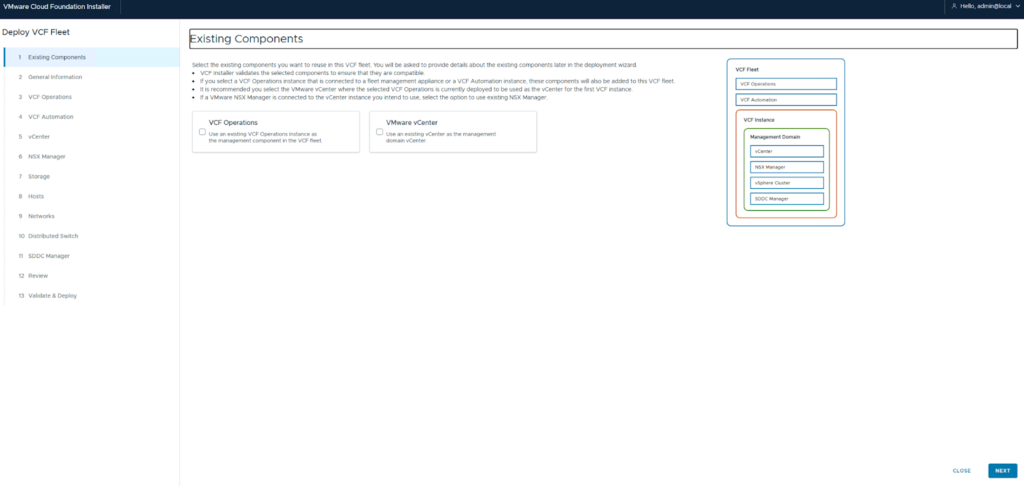
If you have an existing VCF Operations or vCenter you wish to bring in for brownfield, check the relevant boxes. I do not so this will not cover those details.
Select Next
Note: All hostname entries will be checked for DNS entries with the DNS servers configured for the VCF Installer. Please ensure to create all relevant host entries before starting.
Enter your information for the Version, instance name, Management Domain name, Deployment mode and DNS\NTP info
Click Next
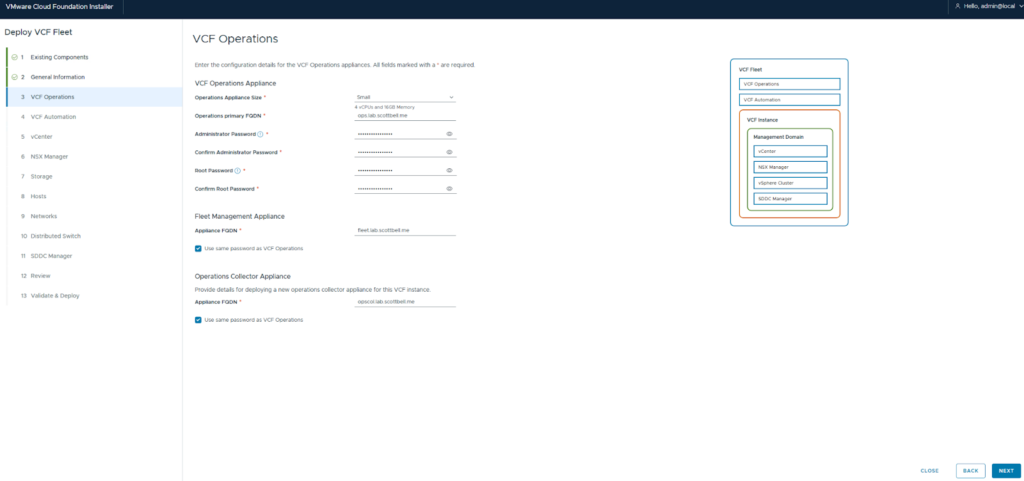
Put in your info for your Operations, Fleet Management and Operations Collector Appliances
Click Next
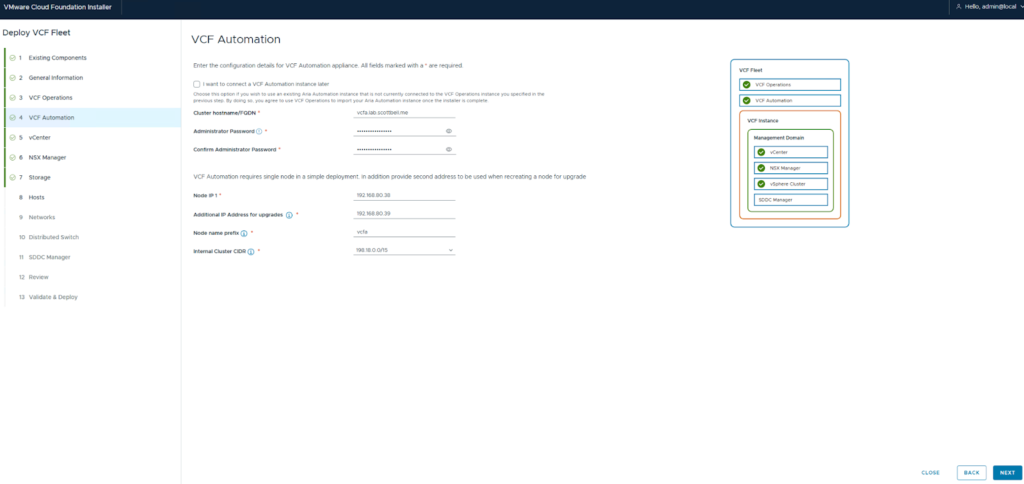
Now enter your information for Automation.
Note the Node name prefix, the VCF Automation node(s) will start with that and have a random ending for the name.
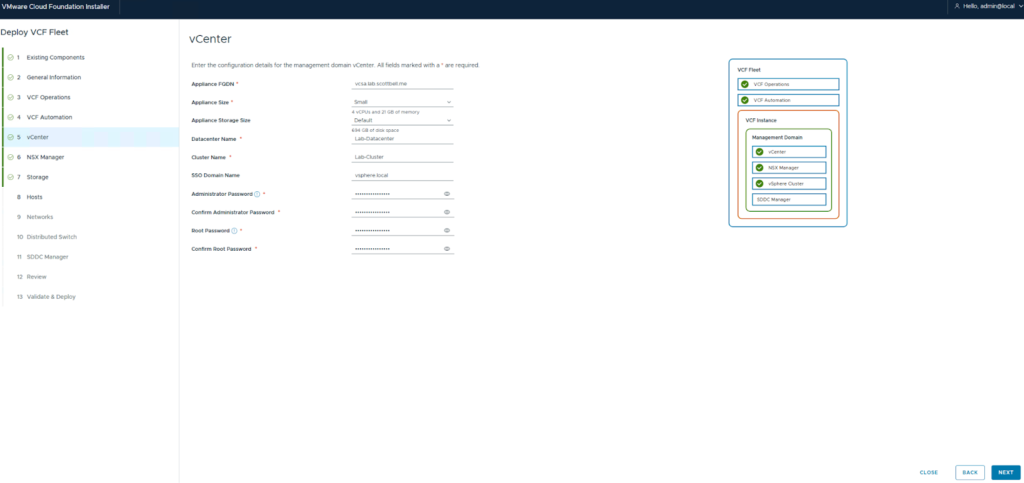
Enter your information for vCenter and click Next
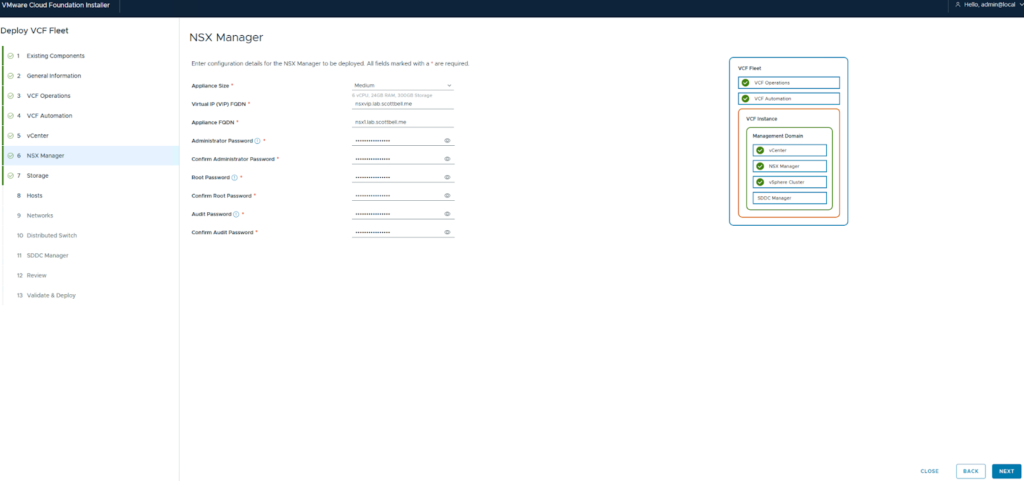
Enter the information for the NSX Manager(s) and click Next
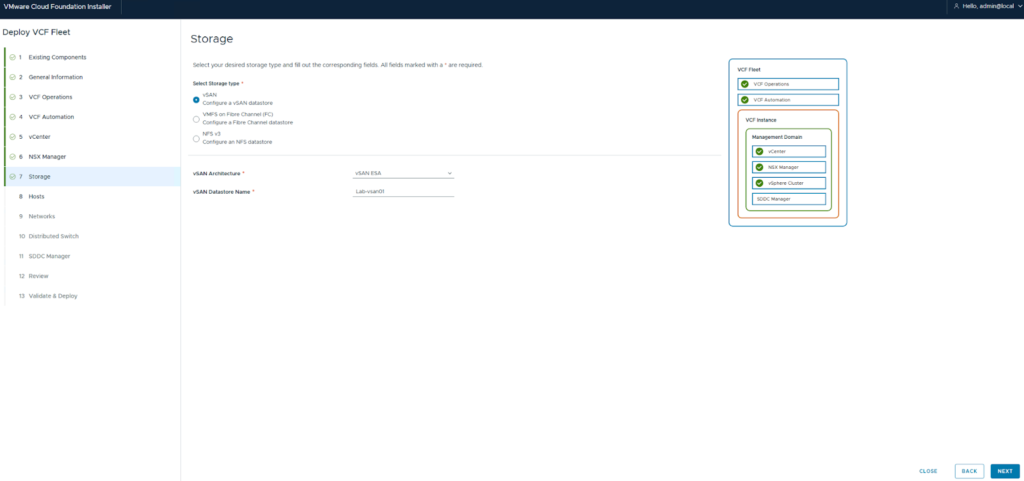
Select the storage architecture being used. I will be using VSAN ESA. Click Next
Note, if your doing something like my homelab where the NVME drives are not on the Hardware Compatibility List (HCL), you may need to add William Lam’s custom VIB to get your drives accepted.
Direct Link to the github repo:
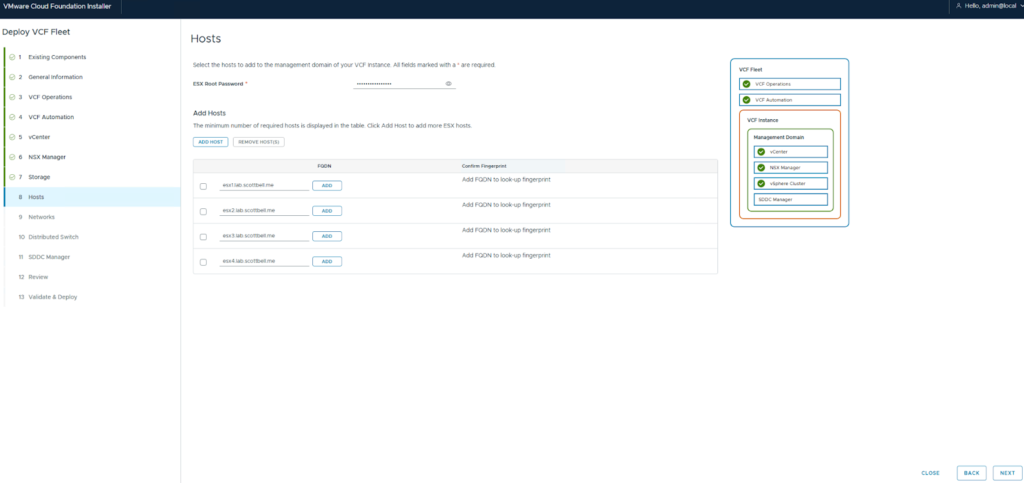
Add your host info and then click Add to each to retrieve the SSL thumbprint
Note that the root password will need to be the same for all hosts being added. Use that password for the ESX Root Password
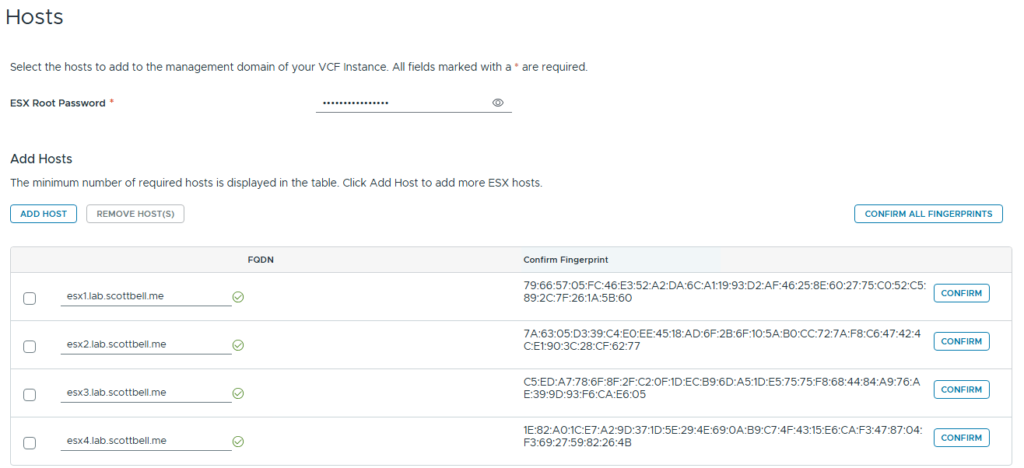
Select confirm all fingerprints if they match up
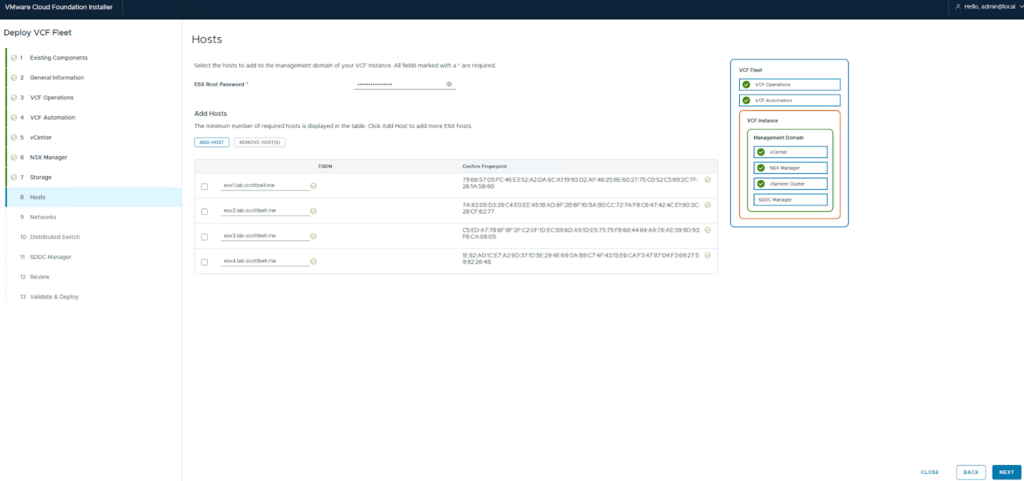
Once the thumbprints are accepted, select Next
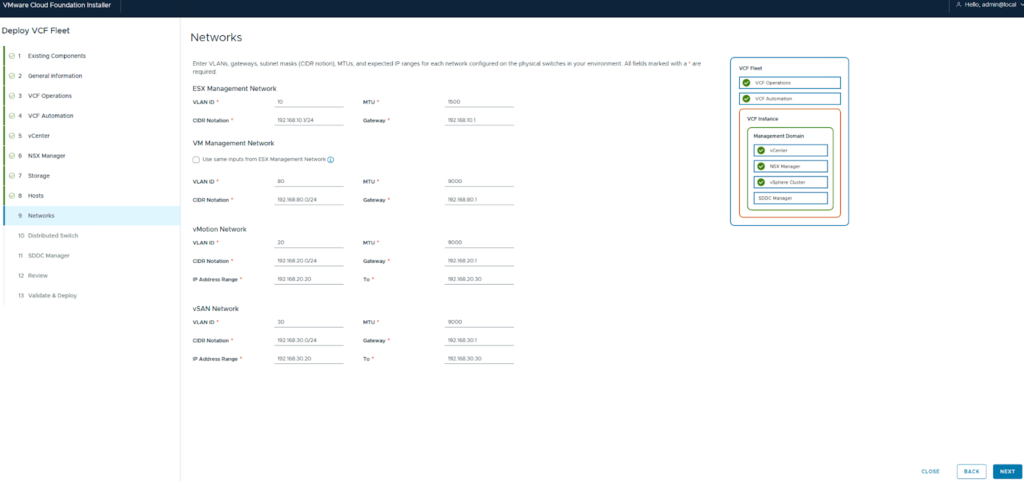
Enter the VLAN info for your various subnets and then click Next

Enter the Distributed switch information for the networks you are configuring. If you want to do custom arrangements of Active\standby links, here’s where to do so.
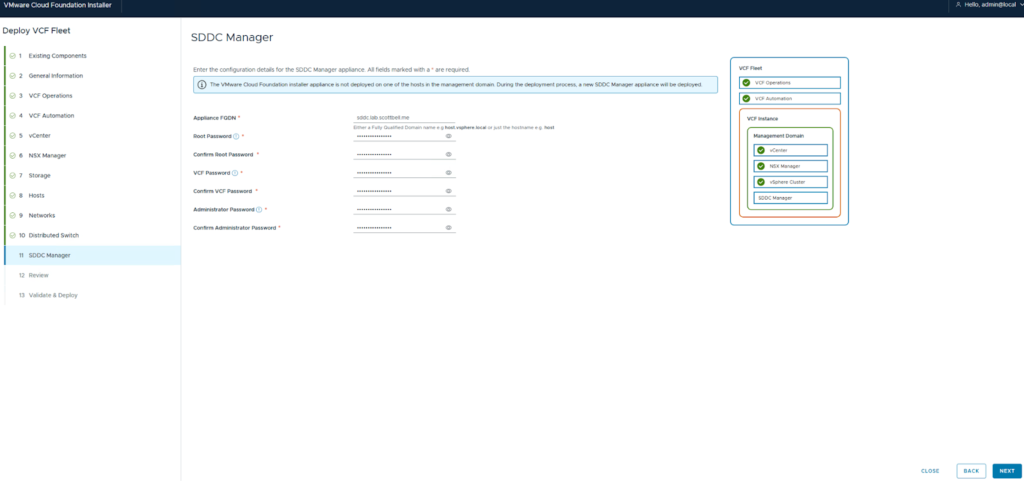
Enter the information for the SDDC and click Next
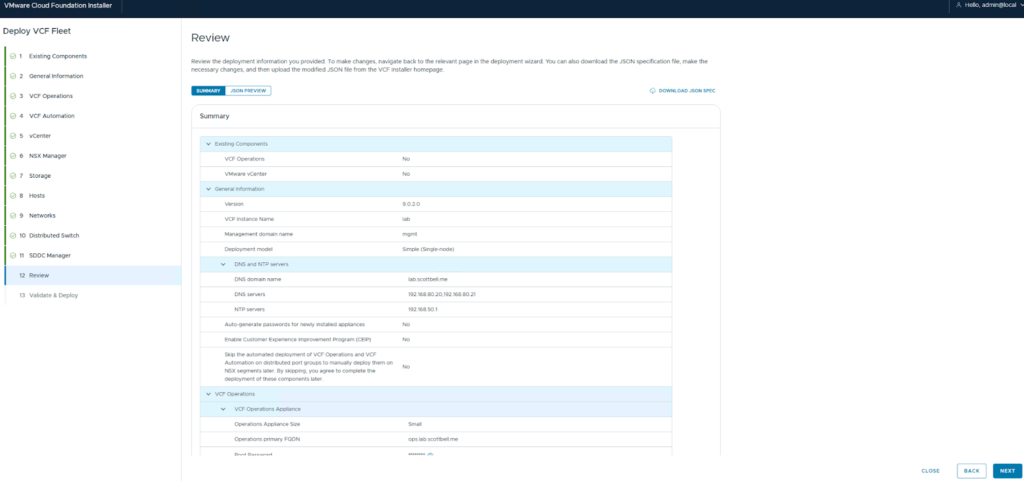
Review the information you entered and then I would recommend downloading the JSON spec in the upper right for future deployments, or redeployments if your practicing in a lab.
Click Next once you have validated the information
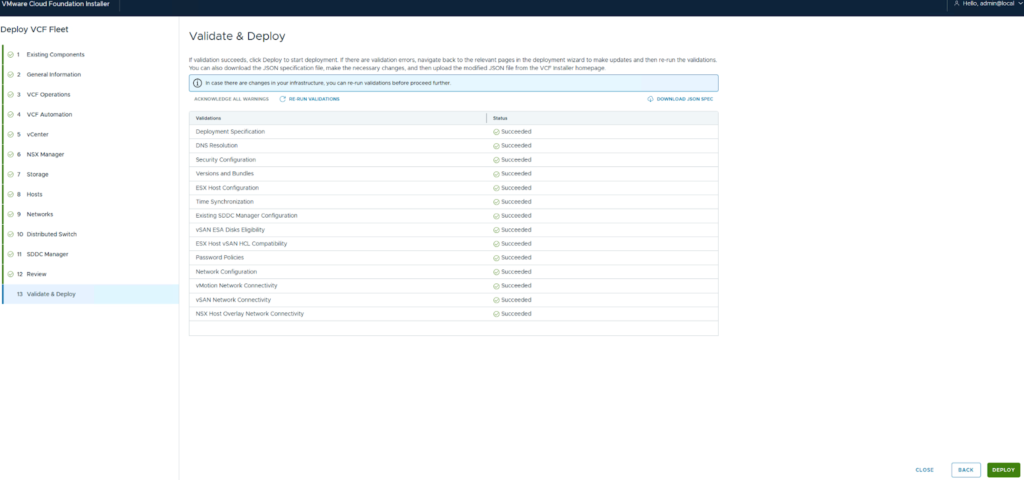
Now that the Validations have completed its time to kick it off. Click Deploy
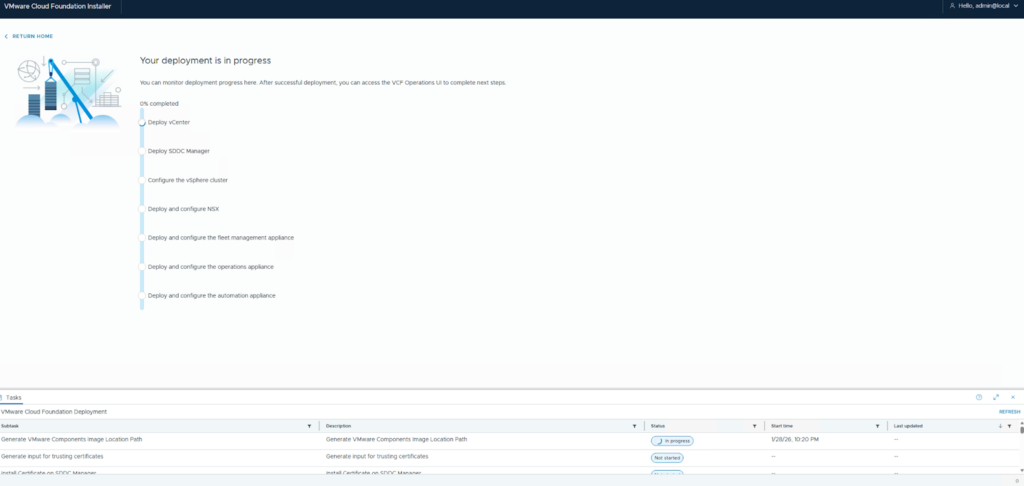
Now you will be brought here for the status and progress of the deployment. This will take a while so might be a good time to catch up on work, sleep, or food.
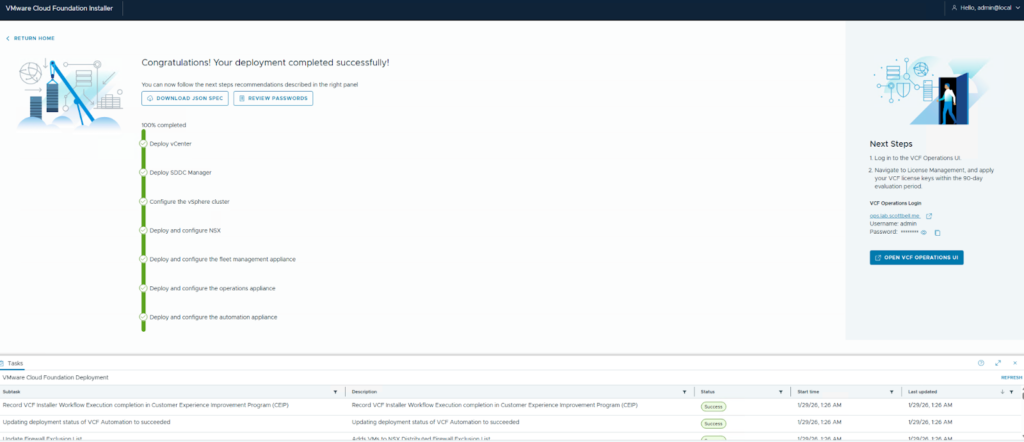
Once completed you will see this completed status with a link to VCF Operations on the right
Home Lab, Homelab, VCF, VCF 9, VCF Installer, VMware