Initial Login
Once the VCF Operations appliance is deployed, the first step is to perform the initial configuration. This includes securing the environment with CA-signed certificates and linking the Offline Depot we built in the previous post.
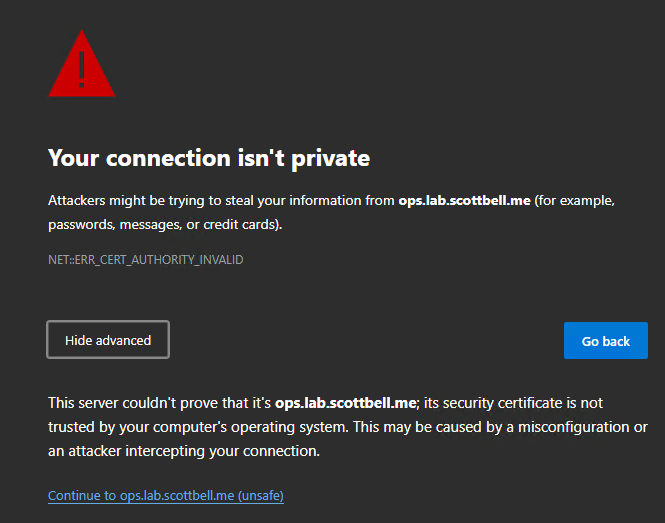
When first navigating to the VCF Operations UI, you will likely see a “Certificate Not Trusted” warning. If you are confident you are at the correct FQDN or IP, click to proceed to the login page.
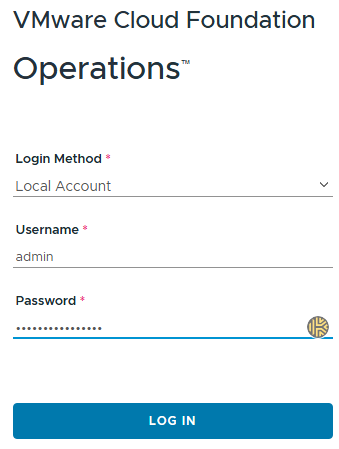
Log in using the default admin account credentials.
Pro-Tip: Before diving into the technicals, I prefer to switch to Dark Mode via the user profile settings—it makes the long configuration hours much easier on the eyes.
Link the Management Offline Depot
To manage the lifecycle of your environment, VCF Operations needs to know where your binaries are stored.
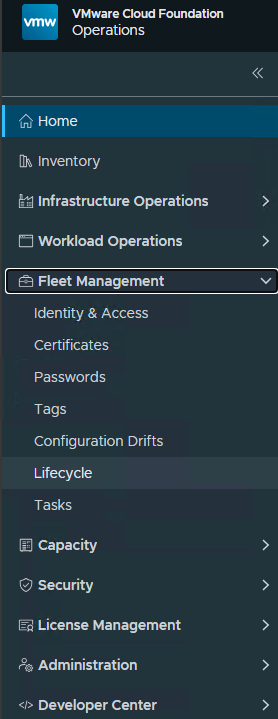
Navigate to Fleet Management > Lifecycle in the left-hand pane.
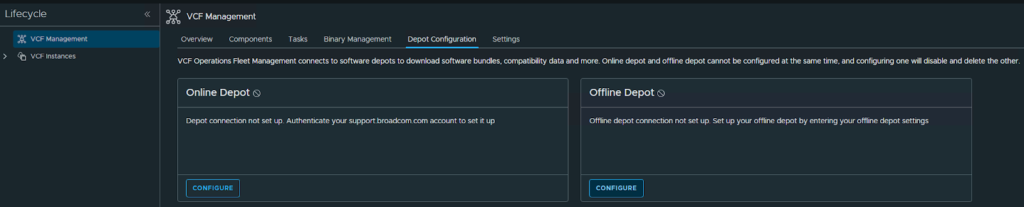
Select the appropriate Depot to configure. I will be configuring offline depot
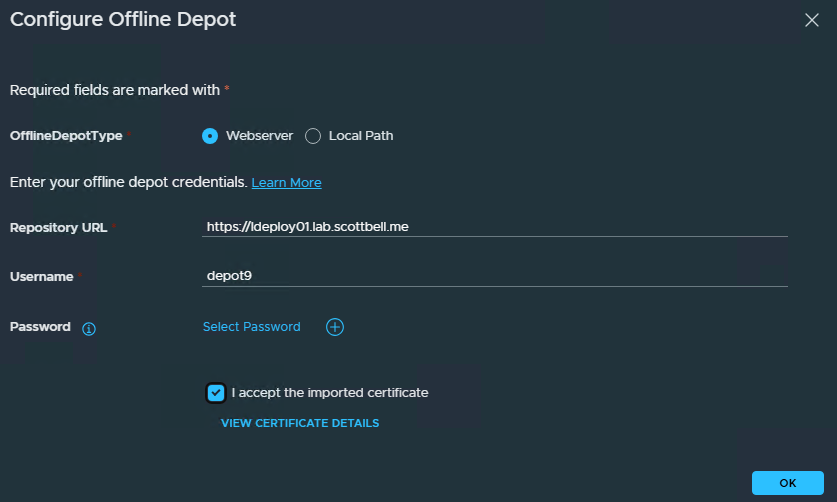
Configure the Connection: Enter the URL for your IIS Offline Depot.
Certificate Trust: Ensure you check the box to Accept the imported certificate.
Credential Management: If you haven’t saved the depot credentials yet, click the + icon next to Select Password
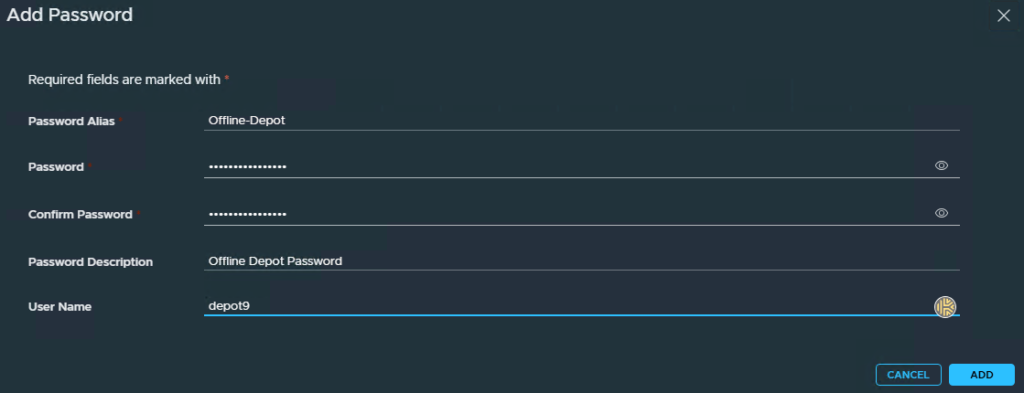
Enter the account information for the depot and click Add.
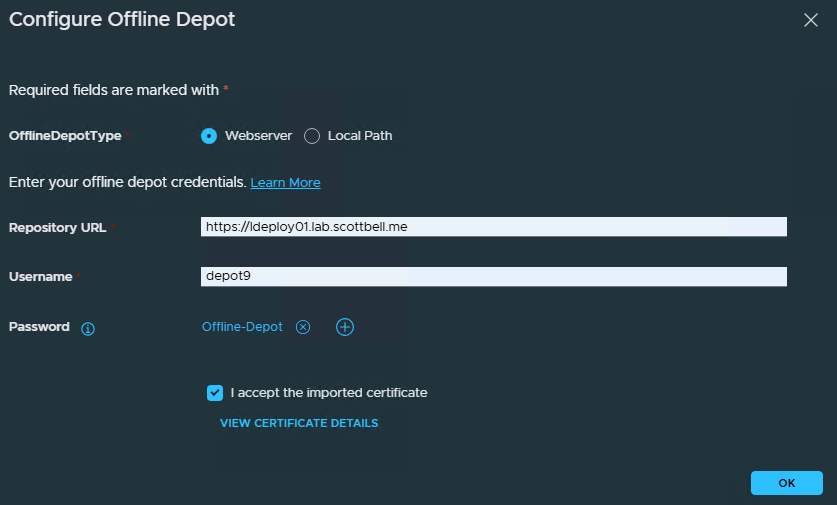
Return to the configuration screen, choose the newly created password from the dropdown, and click OK.
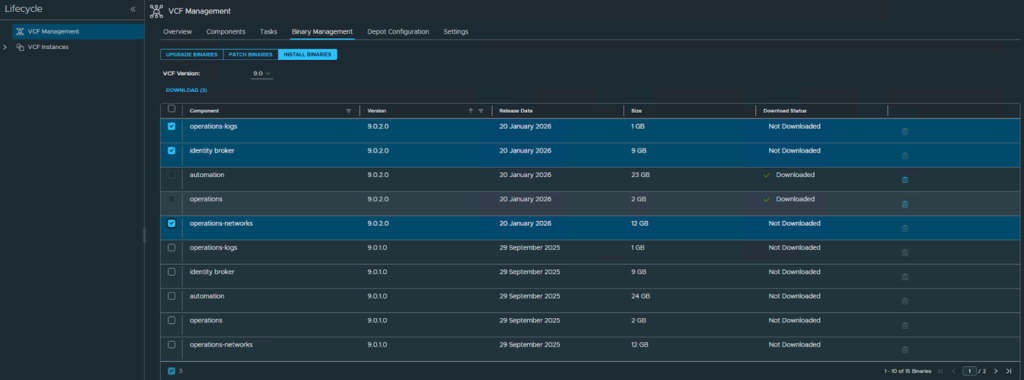
Once the depot is linked, navigate to Binary Management > Install Binaries. You will see extra software components like Operations for Logs and Identity Broker. These are required to deploy their respective components later.
Select the ones you need and click Download. Once finished, the status will change to Downloaded
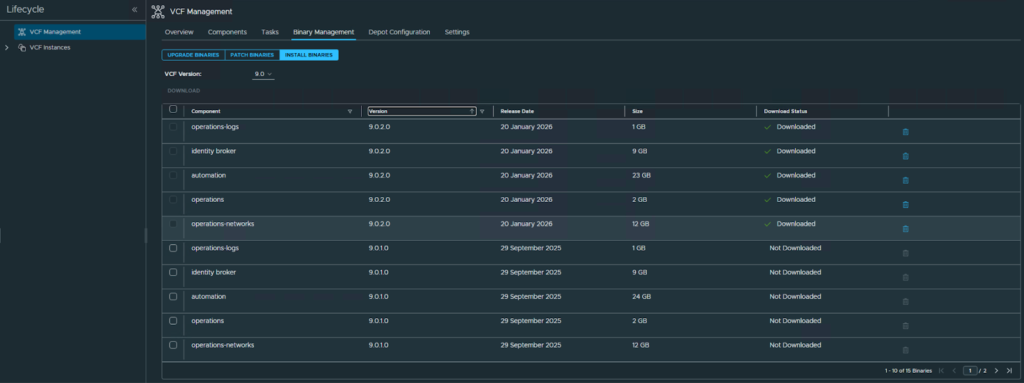
Once downloaded you will see the Download Status changed to Downloaded
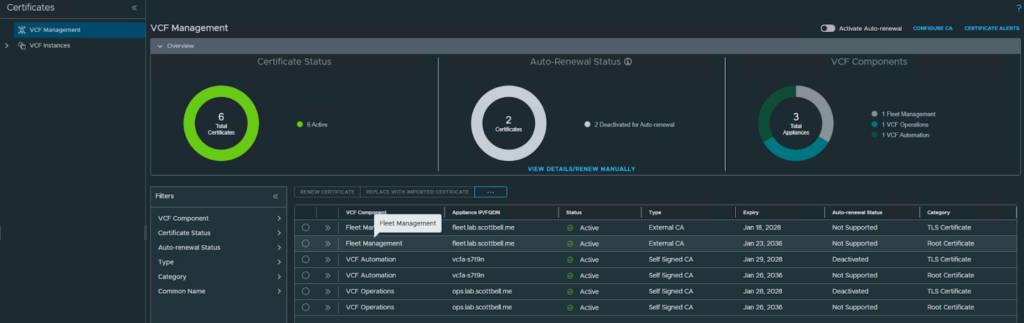
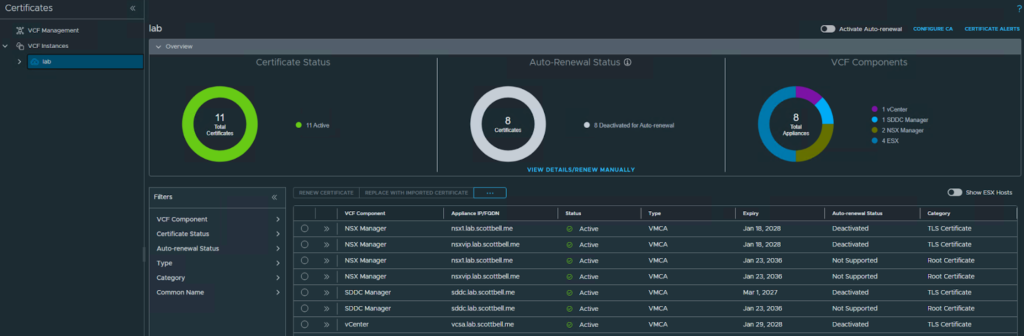
Configuring Certificates (Microsoft CA)
Securing your VCF nodes with trusted certificates is a critical “Day 1” task.
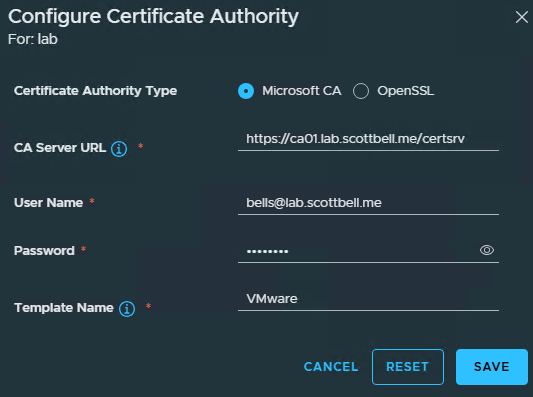
Step 1: Configure the Global CA
Under Fleet Management, select Certificates, then select Configure CA.
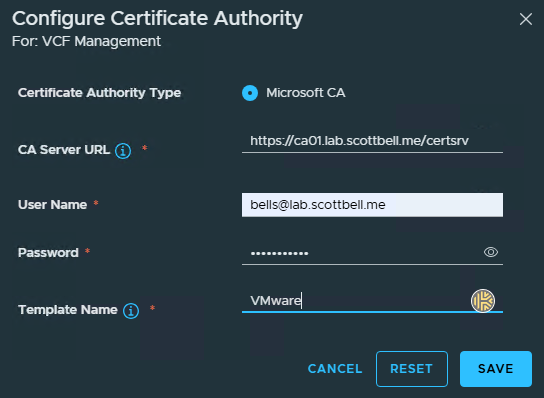
Enter the details for your Microsoft CA server. If you haven’t created a certificate template yet, refer to my guide here: https://www.scottbell.me/create-certificate-template-for-vmware-services/. Click Save.
Step 2: Configure the VCF Instance CA
Still within the Certificates section, select VCF Instances, choose your instance, and click Configure CA.
nput your certificate server and template information. Note that OpenSSL is also an option here. Click Save.

Step 3: Generate and Replace Certificates
Click the Actions (three dots) menu and select Generate CSR.
Go to the VCF Management section and select your first node.
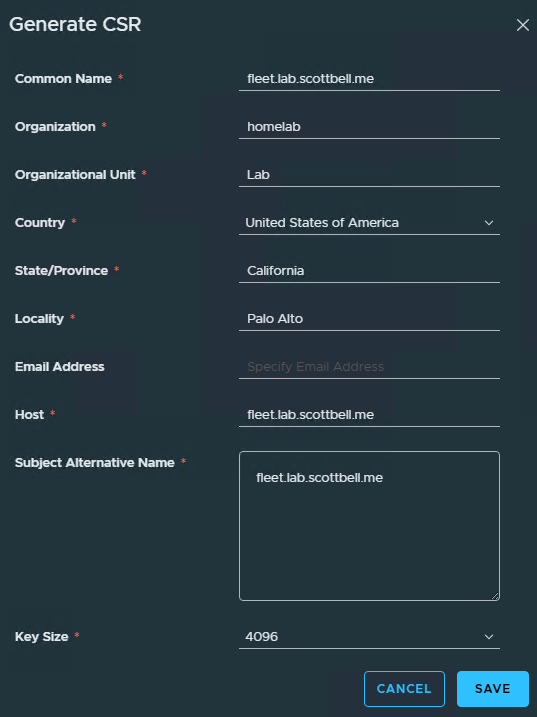
Fill in the required organizational information and click Save.

Once finished, a green banner will confirm the CSR has been generated.

Once the “CSR Generated” banner appears, click the Actions menu again and select Replace with Configured CA Certificate.
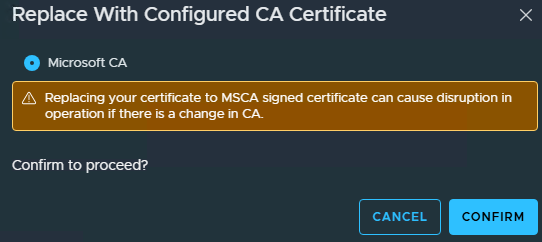
Confirm the Action: You will see a warning regarding potential service disruption; click Confirm.

Once finished, a green banner will confirm the update. Note that it may take a moment for the UI to reflect the change.

The Type column should now reflect Microsoft CA. Repeat these steps for the remaining nodes.
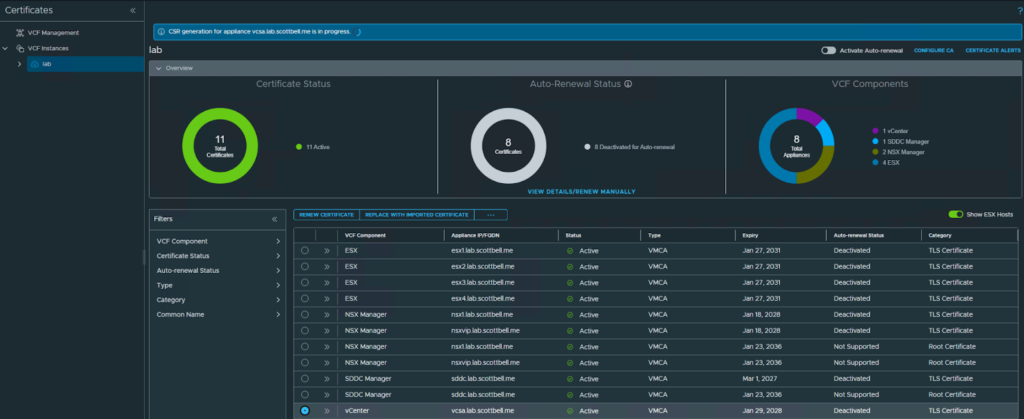
You would see the following once all certificates are replaced.
Link the VCF Instance to the Offline Depot
While we linked the Management components earlier, we must also point the specific VCF Instance to the depot.
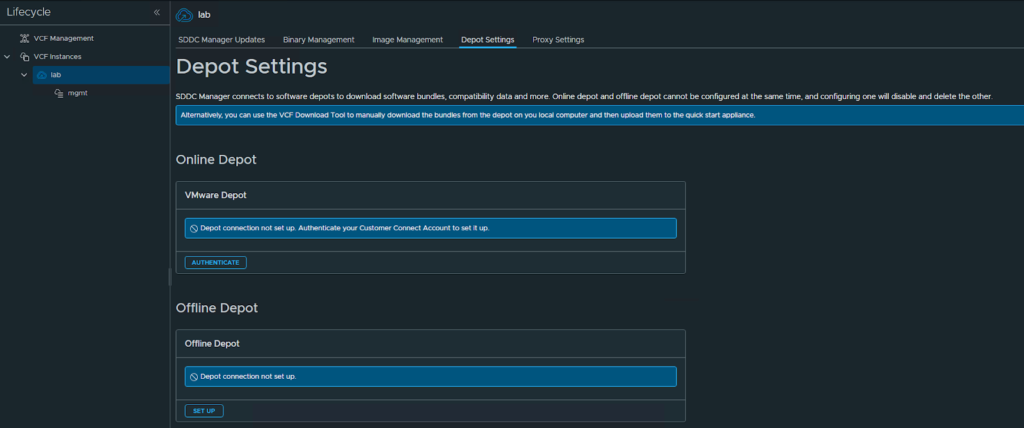
Navigate back to VCF Instances, select your instance name, and go to Depot Settings. Choose Offline Depot.
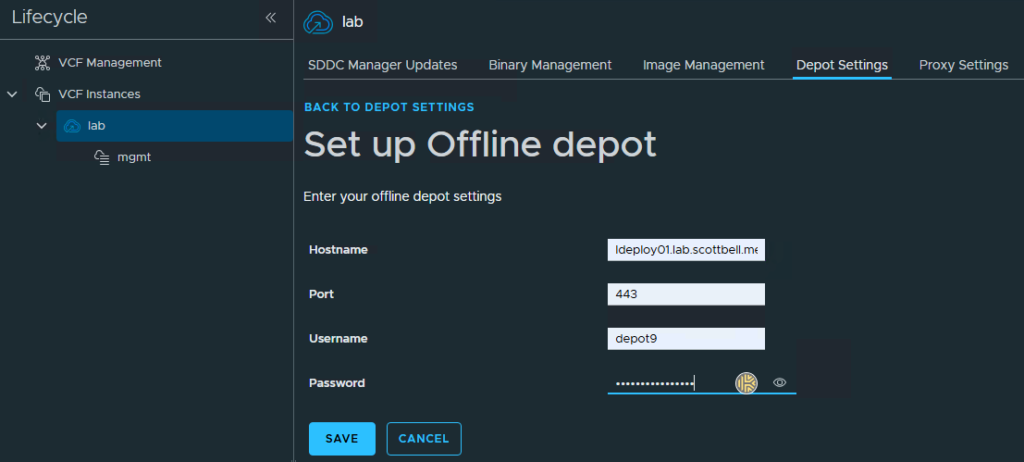
Enter the depot information specific to this instance and click Save.
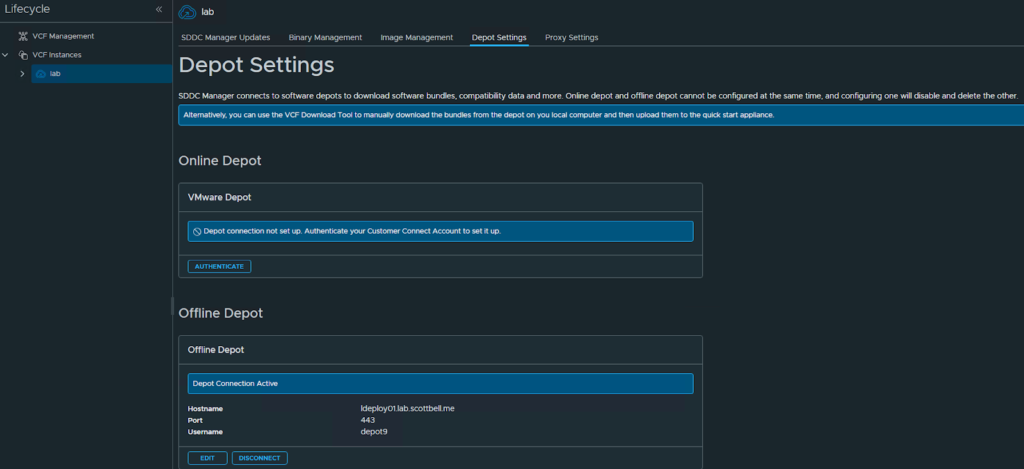
Once saved, you will see your offline depot is successfully configured.
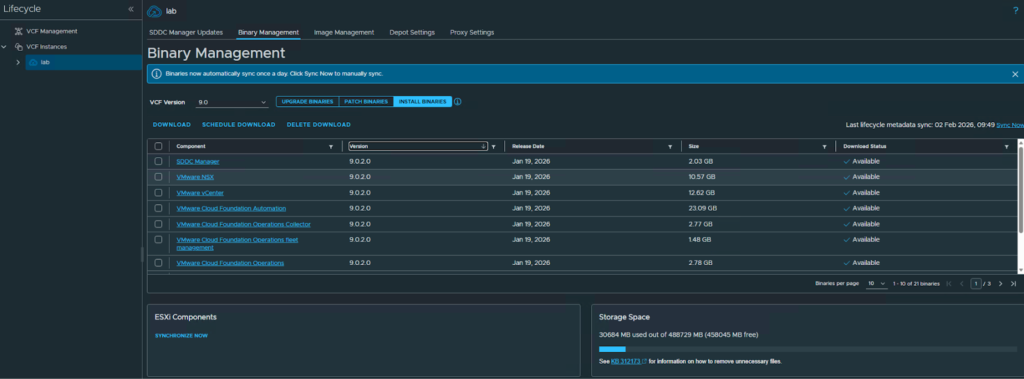
Navigate to Binary Management to verify that the binaries are now available for the instance.
Congratulations! You have established the foundational elements for your VCF environment and are now ready to deploy additional workload components.
Home Lab, Homelab, VCF, VCF 9, VMware