Update ESXi 7 using CLI
December 1, 2025 | ESXi, ESXi 7, ESXi 7 CLI Update, Homelab, VMware | No Comments
Greetings, today we will be updating ESXi 7 to a newer version of 7 using command line and no vCenter. In this case 7.0.3d to 7.0.3w.
Note: All VMs running on the host should be powered off, or vmotioned to another host if there is a vCenter available.
To start we will need to have downloaded the update zip bundle from Broadcom’s download page.
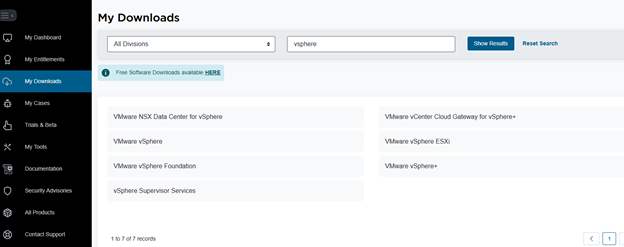
Go to My Downloads on the left, type in vSphere in the search bar, then select Show Results
Select Solutions under the VMware vSphere section name. This is where you will find most every patch.

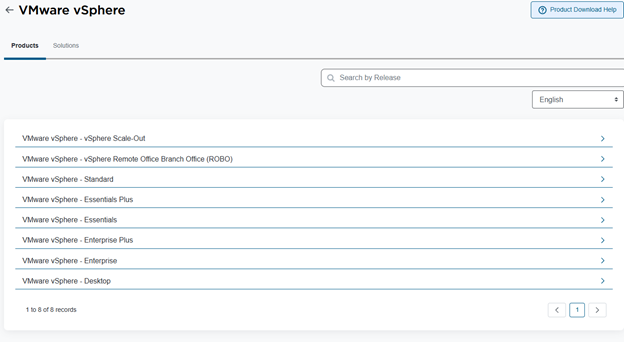
Select the version that applies for you. I will be selecting Enterprise Plus
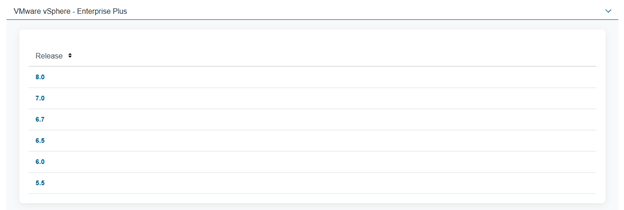
In this case, select 7.0
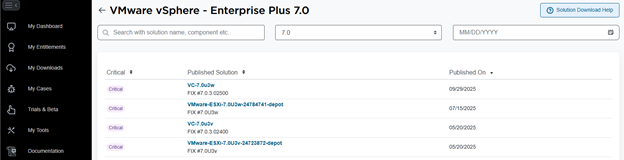
Select the VMware-ESXi-7.0U3w-24784741-depot option

Select the Cloud Icon with the down arrow to download the file. Please save it where you can find it again
Method 1: Using Datastore Browser
Login
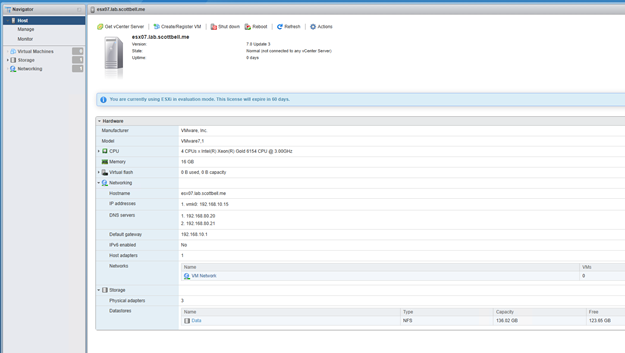
Select Storage on the left-side pane

Select Datastore browser
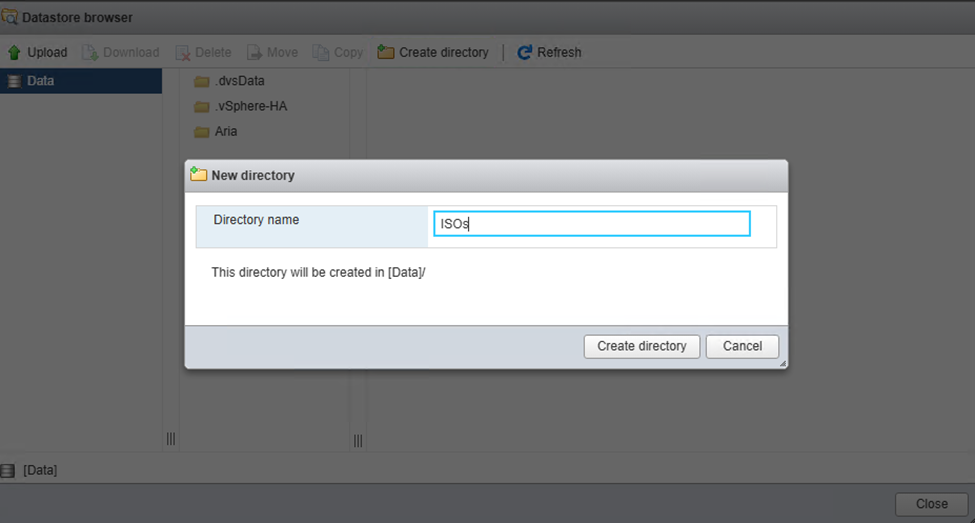
I don’t have any folders in this datastore for ISOs or updates. So I will make one by selecting Create directory and give it the name you want, I’m using ISOs.

Select the folder you made, click Upload, then navigate to and select the file to upload and choose Open

You will get an upload progress indicator in the upper right of the window
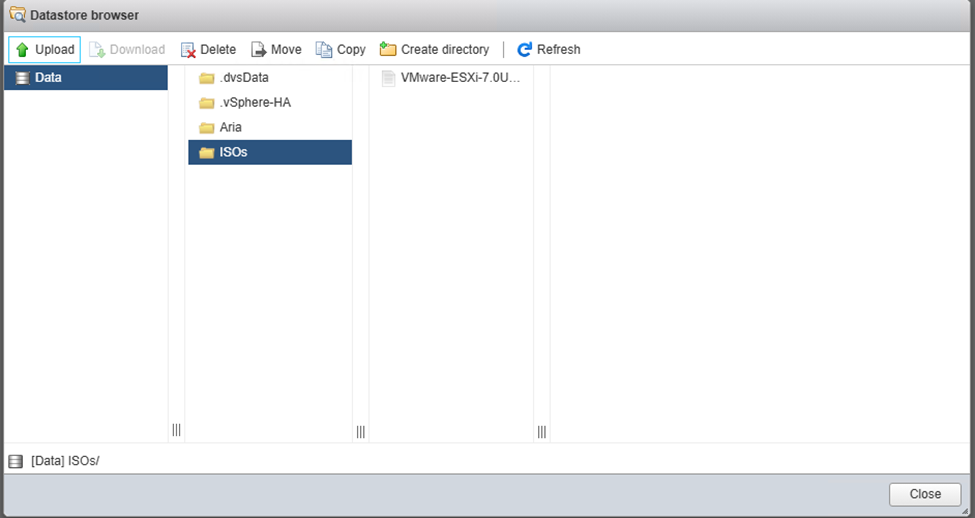
Now that the file is complete, you will see it in the 3rd pane. Click close
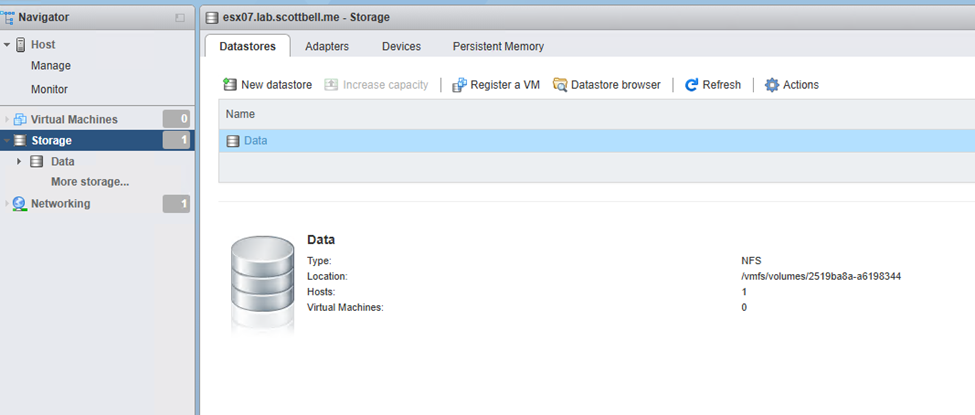
Select Data in the center pane to get the Location. Save that file path as you will need it when we go to update in CLI
Enable SSH: Method 1 (Using Webpage)
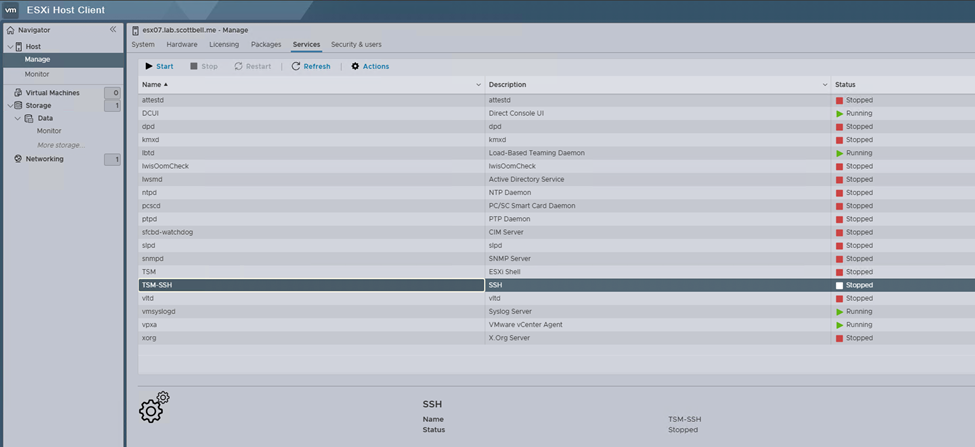
Go to Manage, Services, then scroll down until you see TSM and TSM-SSH, select each one and click Start
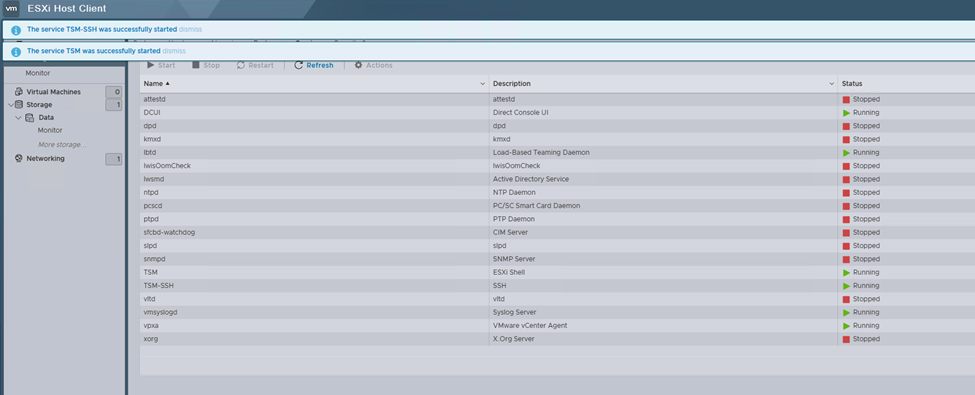
Now the services are running to allow SSH and Shell interactions
Enable SSH: Method 2 (Using DCUI)

Login to the DCUI of your host
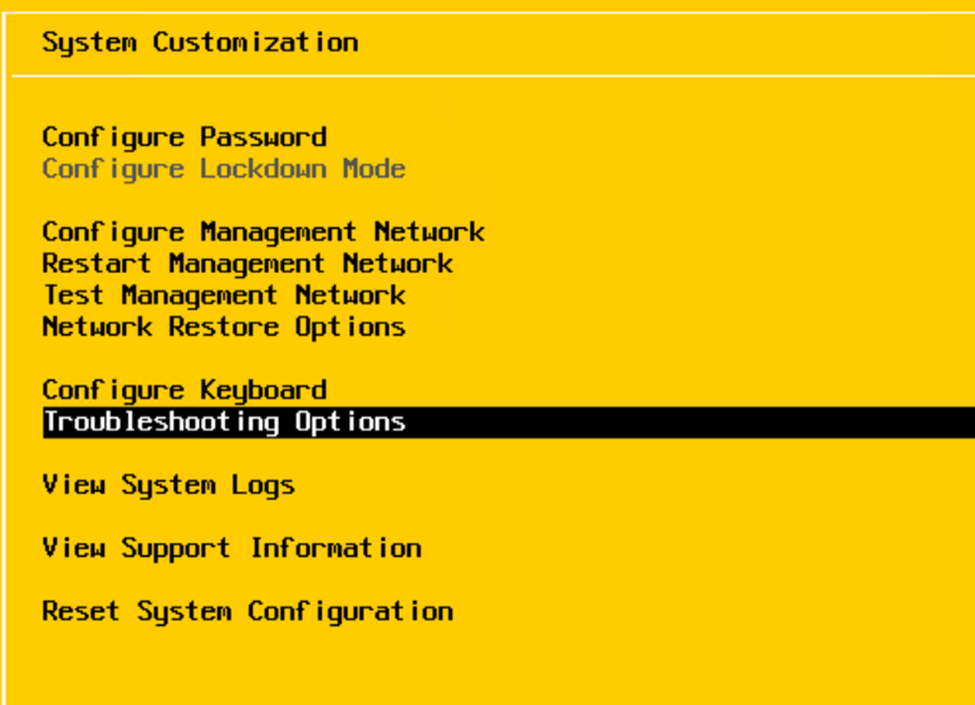
Select Troubleshooting options
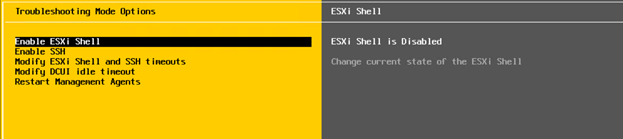
Enable both ESXi Shell and SSH by pressing enter once each line is selected
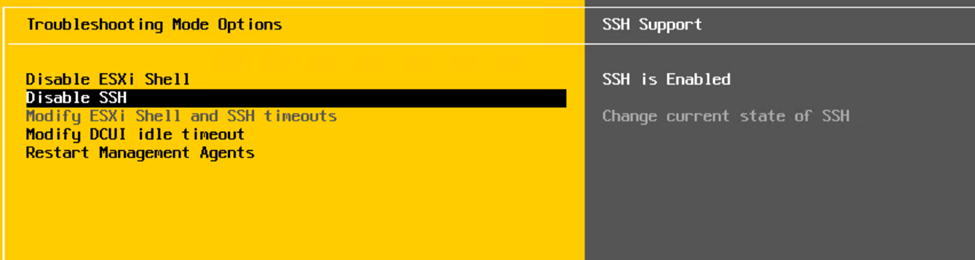
Hit the escape key twice
Method 1: Transferring the file to the host (Using SCP)
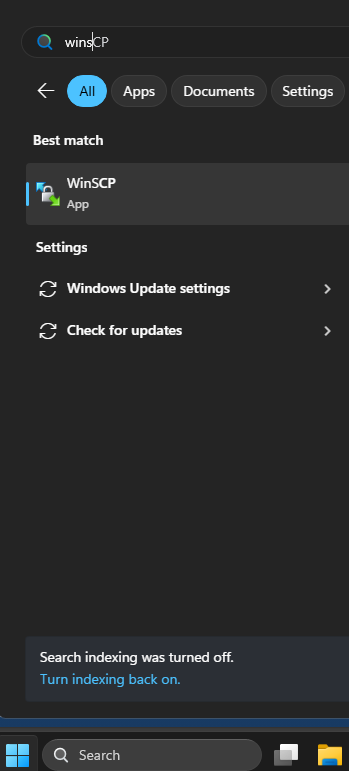
Click on the Start menu, enter winscp and select WinSCP
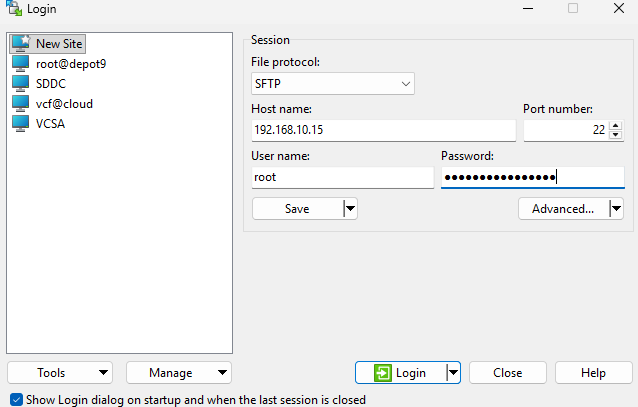
Select New Site on the left pane and then enter the host info on the right pane, then select Login
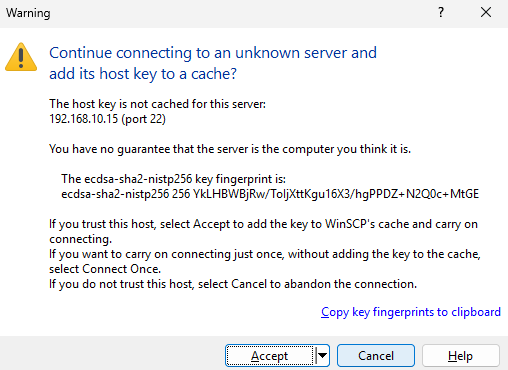
If you trust your host, select Accept
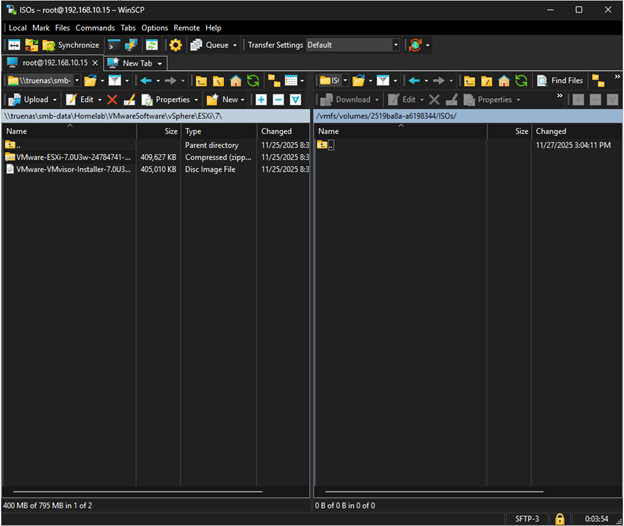
On the left pane navigate to where your file is, on the right side navigate to where you want to save it. I will again use the ISOs folder created earlier.
Yes, I did delete the earlier copies of the transfer.
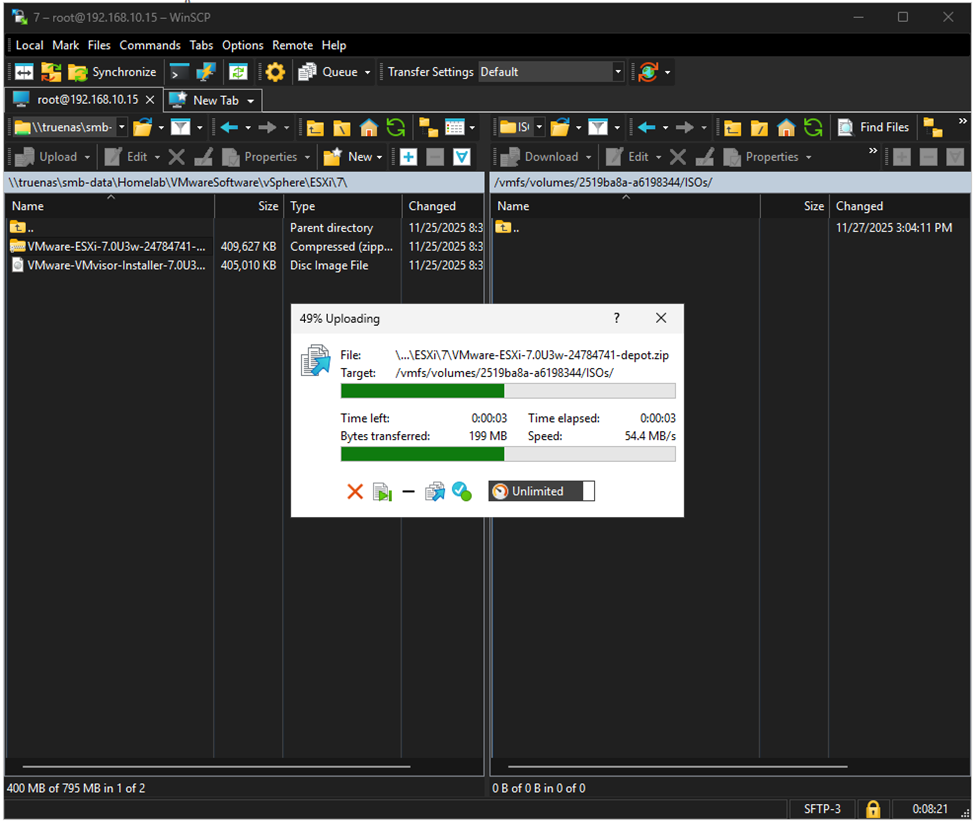
Drag and drop the file from the left pane to the right pane, you will then get this transfer window.
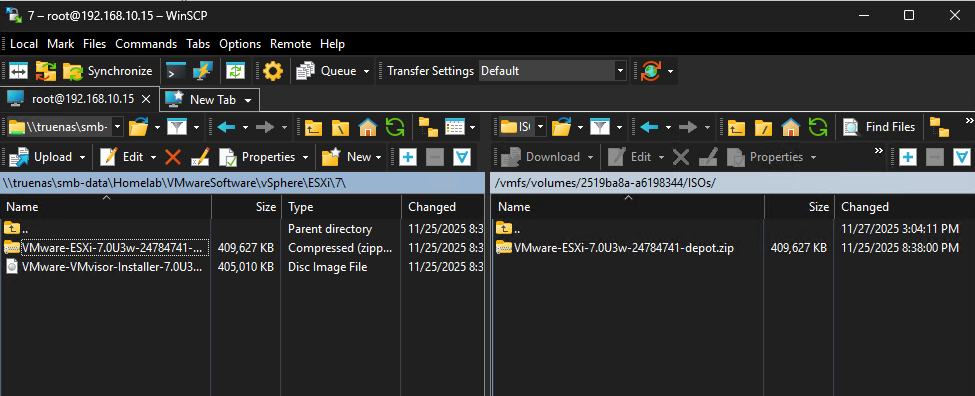
Once transferred the file will show on the right pane.
Method 2: Transferring the file to the host (Using SCP)

Right-click the start menu and select Terminal or Terminal (Admin). SCP can be run from either in PowerShell
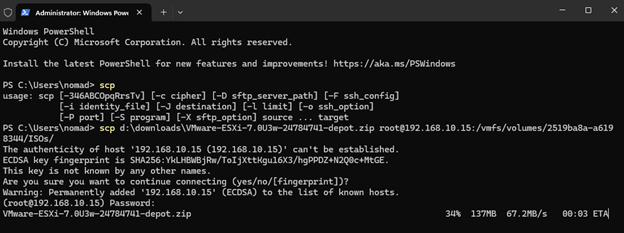
Enter the following command to transfer using PowerShell
scp <file path to your copy of the zip file> root@<ip\FQDN of ESXi host>:<vmfs file path to your folder>
Install the update to the host
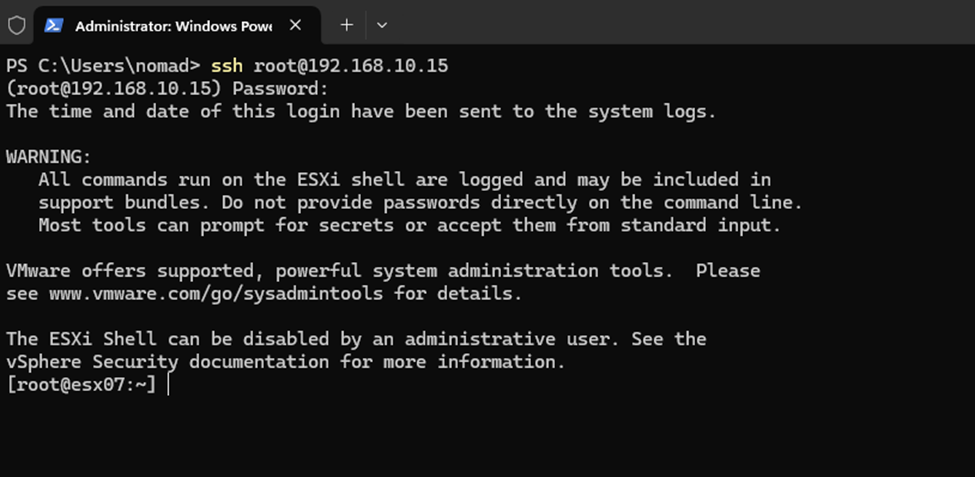
SSH into the host
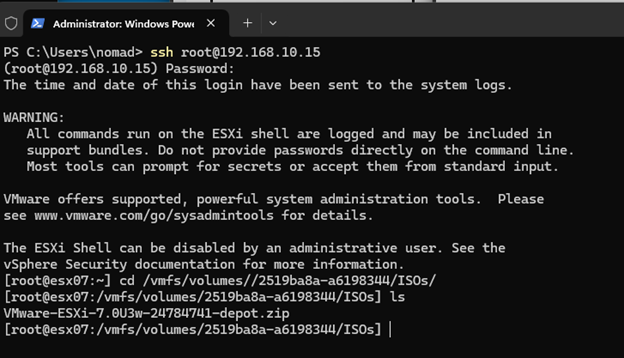
Navigate to the directory you have the file and enter LS

Enter the following command to get the list of update profiles available.
Esxcli software sources profile list –depot=/vmfs/volumes/<your volume ID>/<Folder>/<Update zip file name>
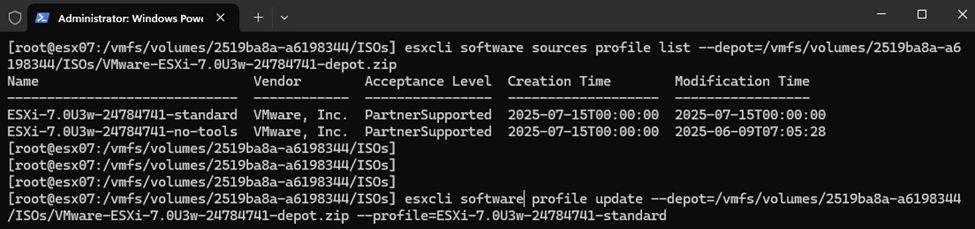
We are now ready to perform the update using the following command.
Esxcli software profile update –depot=/vmfs/volumes/<your volume ID>/<Folder>/<Update zip file name> –profile=ESXi-7.0U3w-24784741-standard
I am using the standard profile as that includes VMware Tools as part of the update.
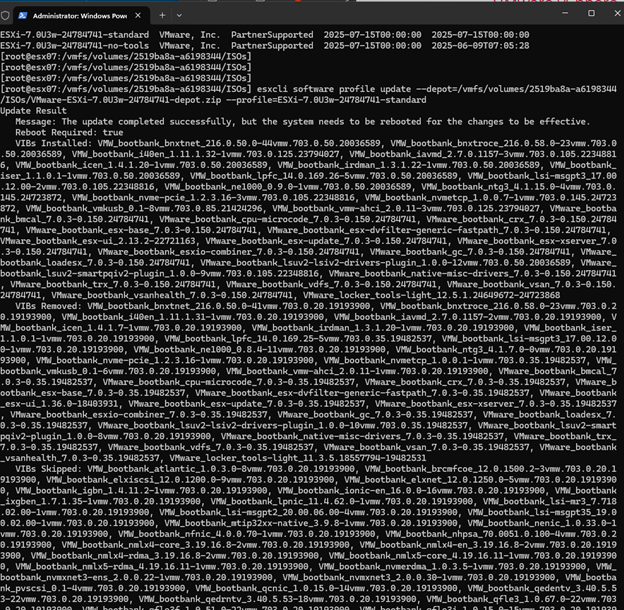
The update output should look like this if it was successful.

Reboot the host to complete the update.
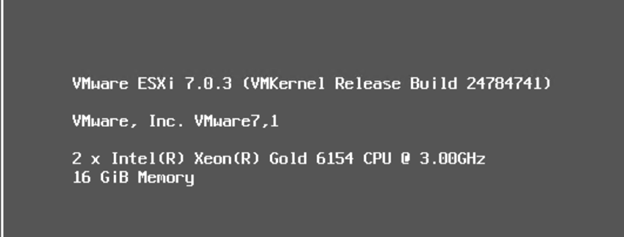
After reboot you should see the following version on the DCUI

Logging into the webpage you should see the following version on the right side Configuration section
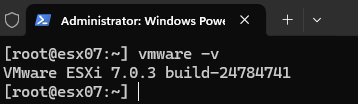
Logging into SSH you should see the following version
You have successfully updated your ESXi 7 host to a newer version of ESXi 7. Congrats and have a good day.
ESXi 7 CLI Update, ESXi7, Home Lab, Homelab, VMware