Install an CA Server for Home Lab (Part 1)
November 26, 2025 | ADCS, Certificate Services, Homelab, Microsoft, VCF | No Comments
Today we are going to be setting up a Certificate Server for the new domain in my home lab. This is part of the systematic rebuild of the lab so that I can write these articles to document the process to potentially help others and for a record of my own on the next rebuild.
The new lab so far has just two domain controllers. I need certificate services to continue with other functions such as the offline depot for VCF, the new jump box I will end up building, and VCF itself with its components.
This will be based on the assumption that you have already deployed a Windows Server, have named it, given it an IP, and domain joined it.
Installing Certificate Services
Select Add roles and features
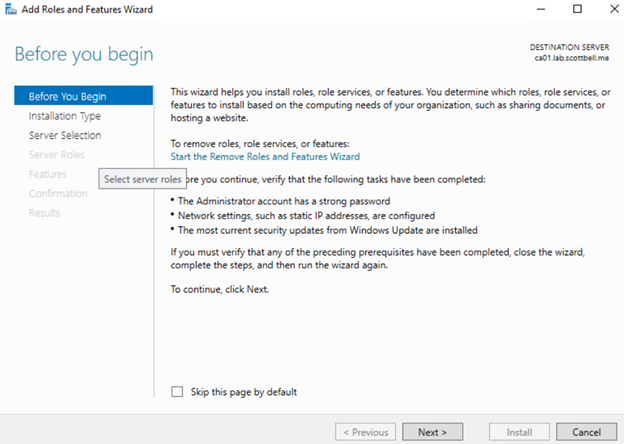
Select Next
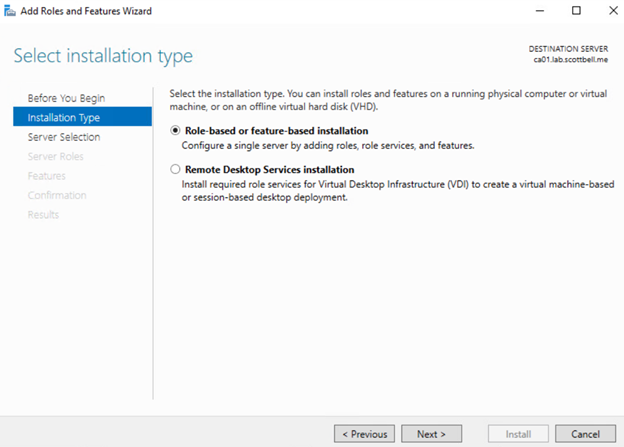
Select Next
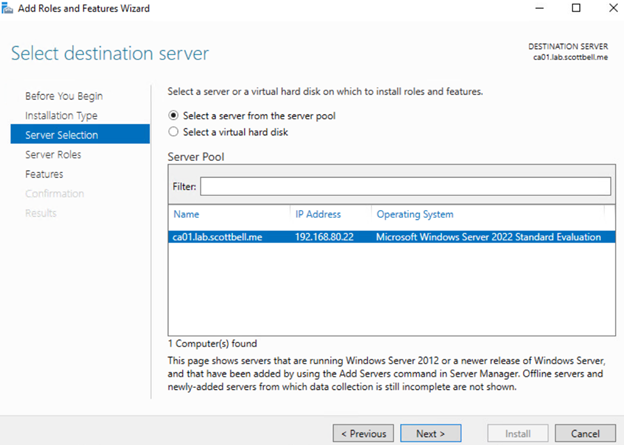
Select Next

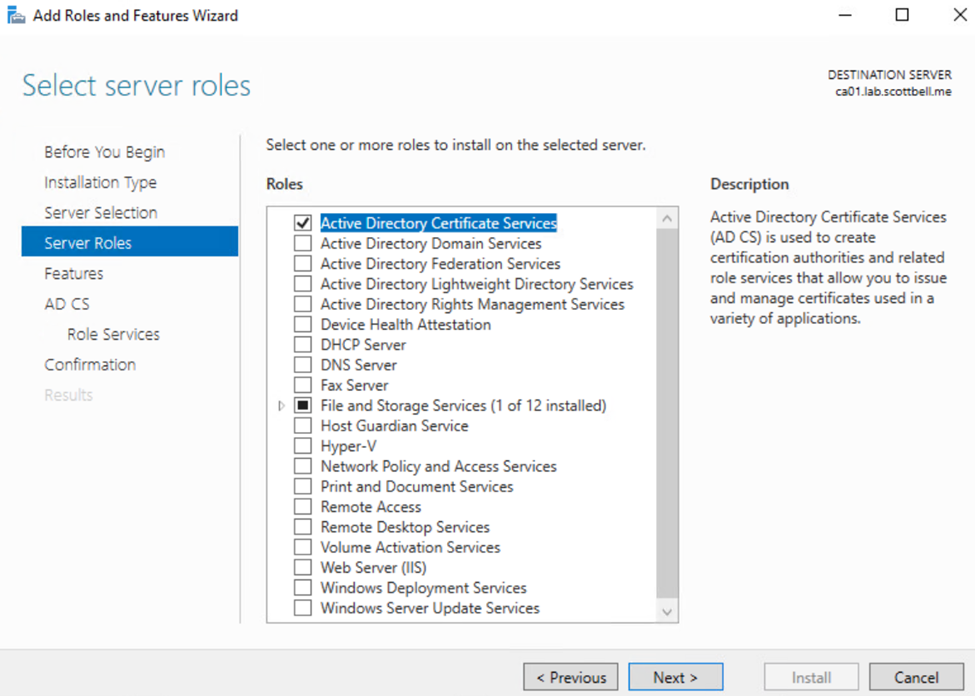
Select Active Directory Certificate Services
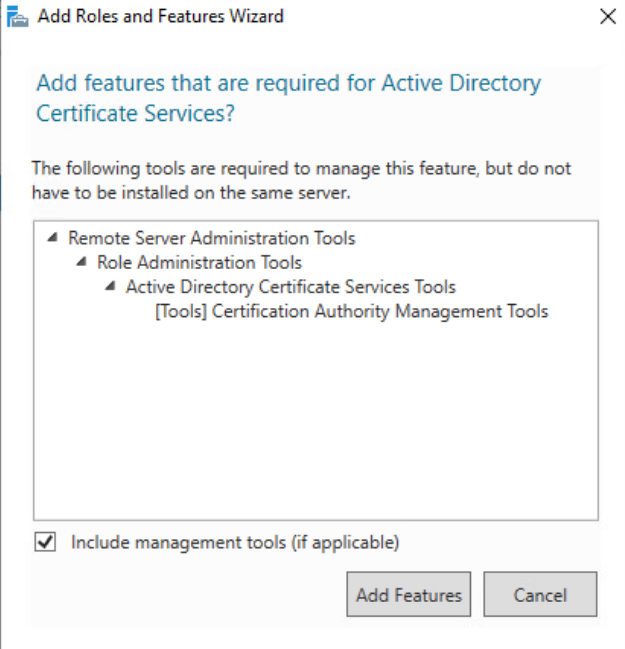
Select Add Features
Select Next

Please read this page before selecting Next, the note does matter
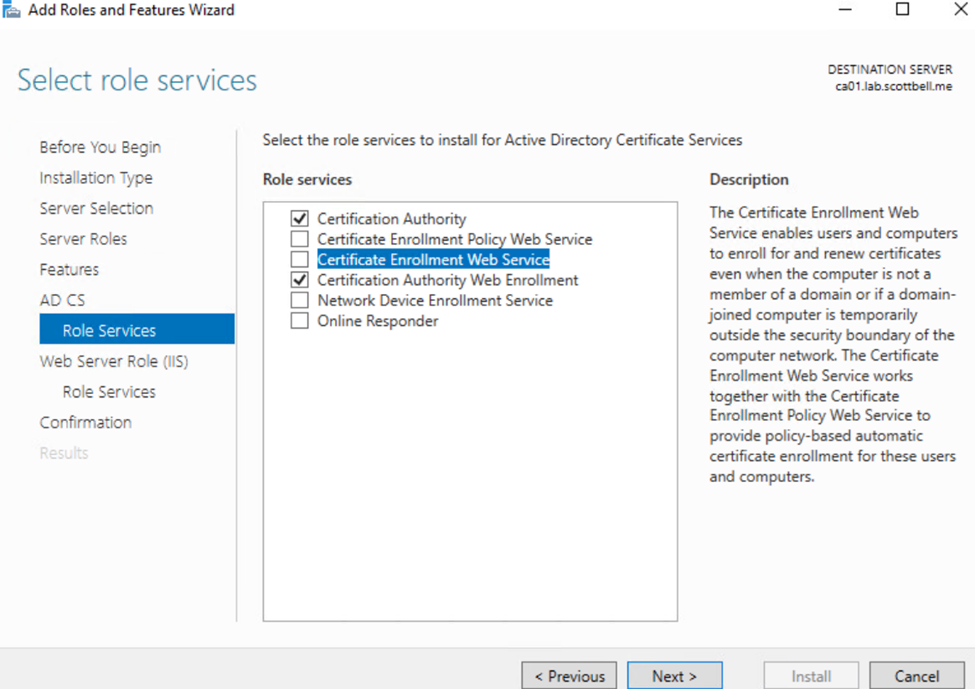
Select Certification Authority Web Enrollment, and Certificate Enrollment Web Service

Once you select Certificate Enrollment Web Service, this window will pop up, select Add Features
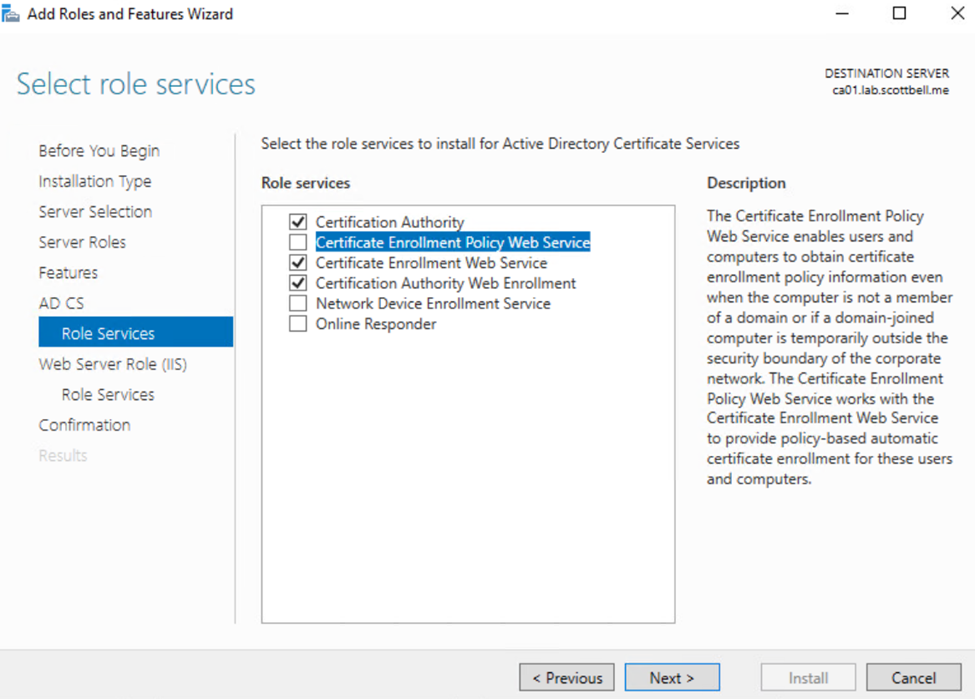
Once the selection matches the above, select Next

Read and select Next

Scroll down to Security section and select Basic Authentication, this is to support VCF functions later. Select Next
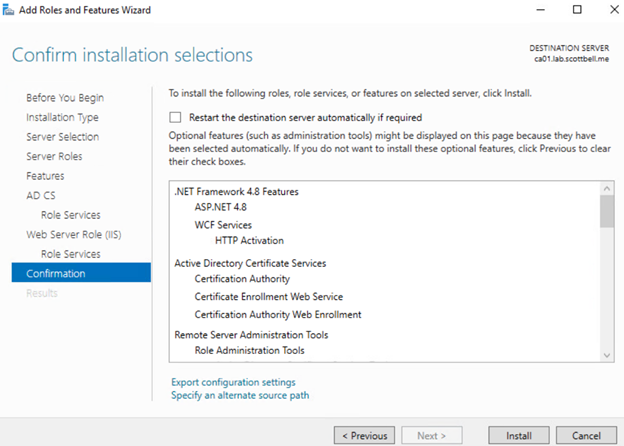
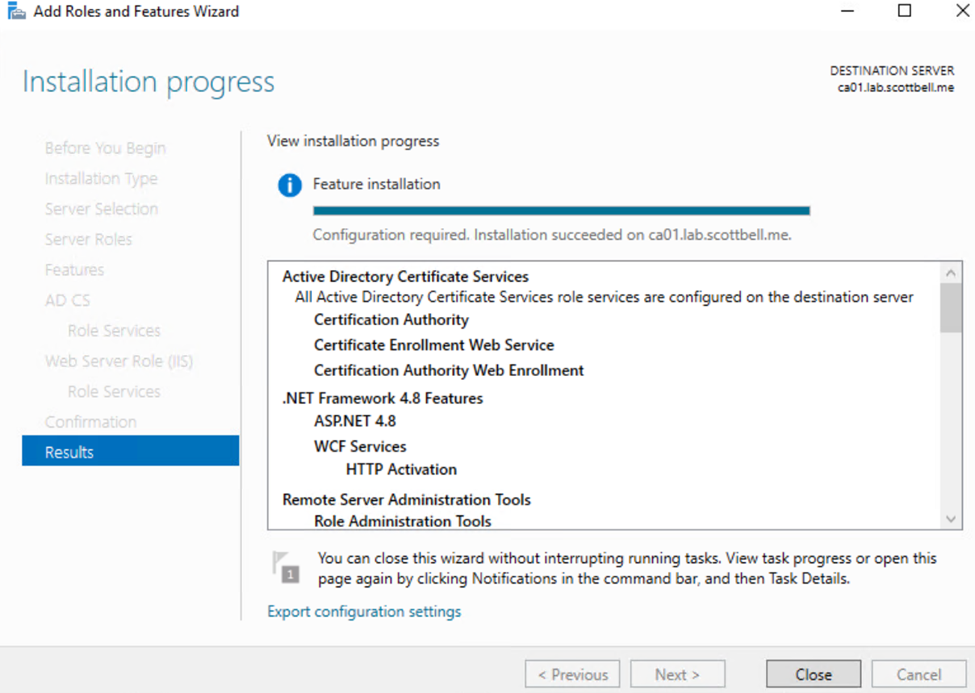
Review the selections and then select Install
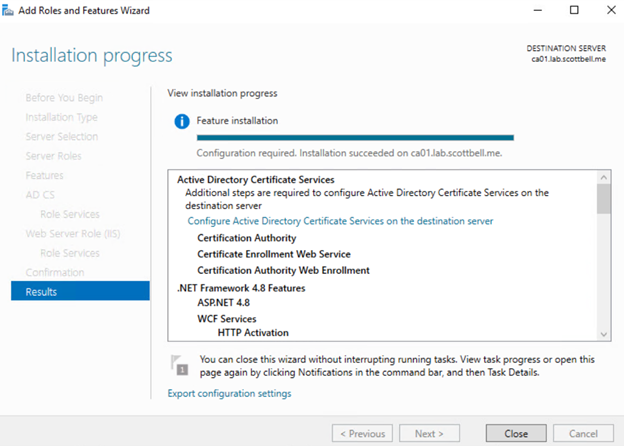
Once the install is finished, select Configure Active Directory Certificate Services
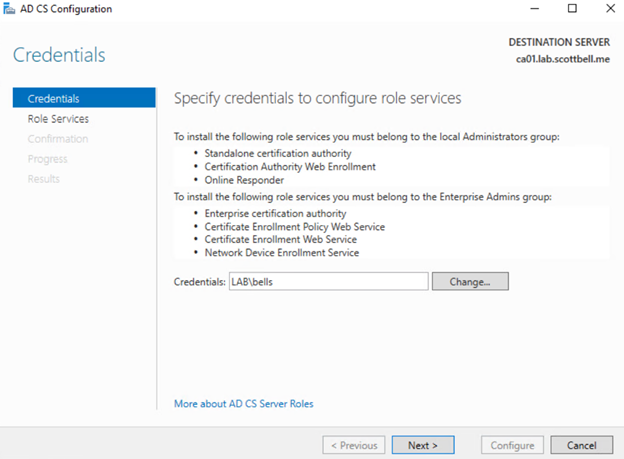
Use your intended account if different than what’s pre-populated based on the logged in account. Then select Next
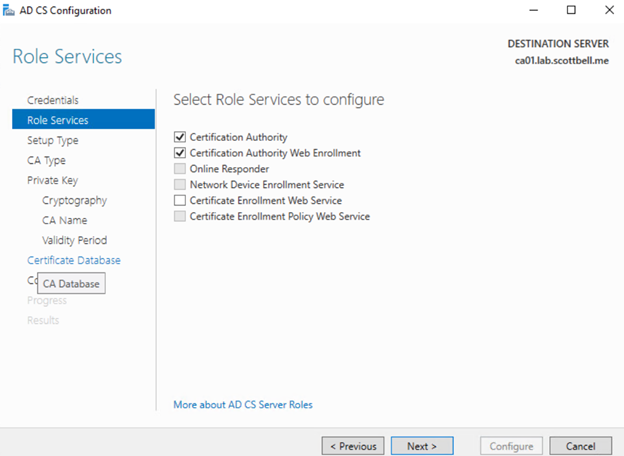
You can only setup the first two at the same time. We will have to come back after for the Certificate Enrollment Web Service after the Certificate Authority is setup. Select Next
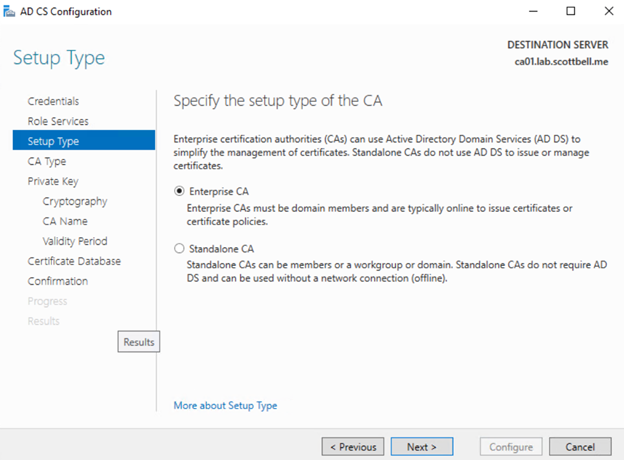
In my case with it being a lab, I will do Enterprise CA where it stays online. If your doing a proper CA in the real world, I would suggested a Standalone Root CA that stays offline when not in use and an Domain-Joined Subordinate CA. Select Next

Again, since this is a lab environment, this will just be a Root CA. Select Next
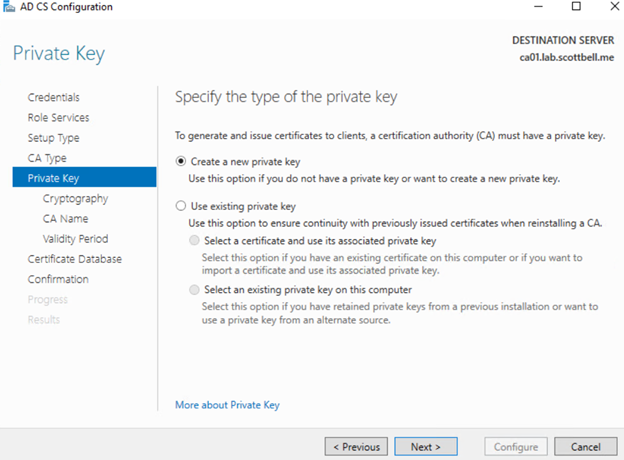
Since this is a new server and not a transfer\upgrade\recovery, I will Create a new private key and select Next
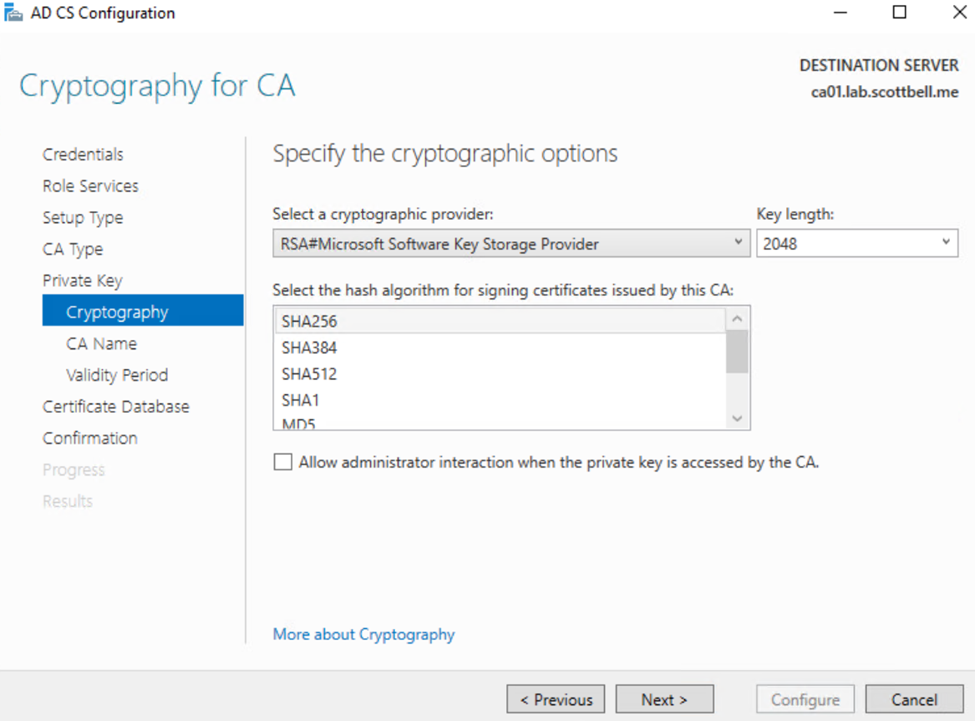
I am going to stick with the defaults here, I am not using anything that needs the admin interaction for extra security so I will leave it unchecked.

I have changed the Common name to be more what I want, but I am leaving the rest the default format. Select Next
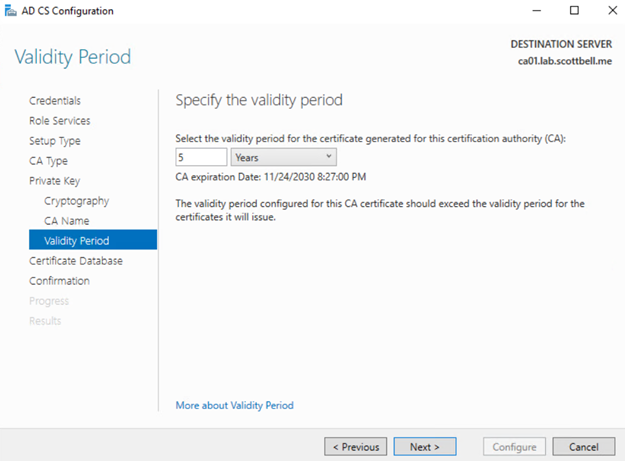
Use whatever timeframe is suitable for you. As this is a lab, it wont survive 5 years so I will leave it at that.
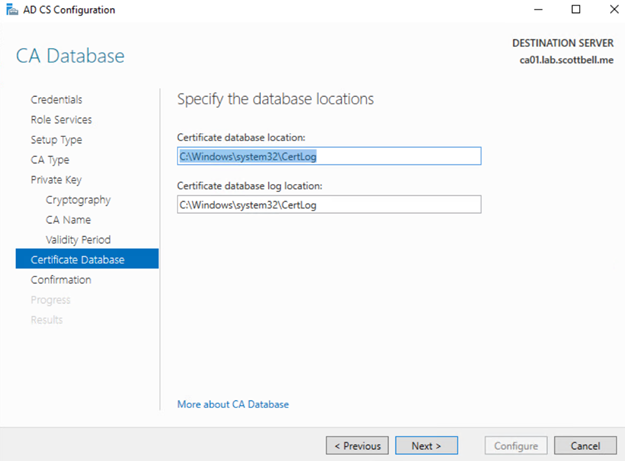
Security needs may require these locations to be moved to a different location\drive. I’m not operating under those requirements so I will be leaving them default. Select Next
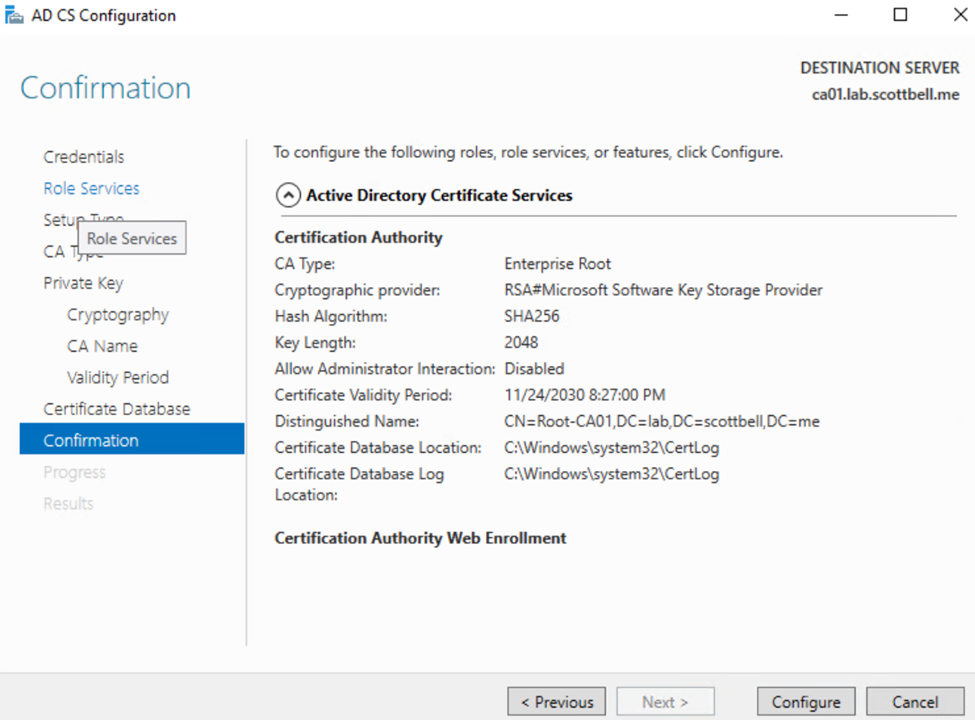
Review the summary and select Configure
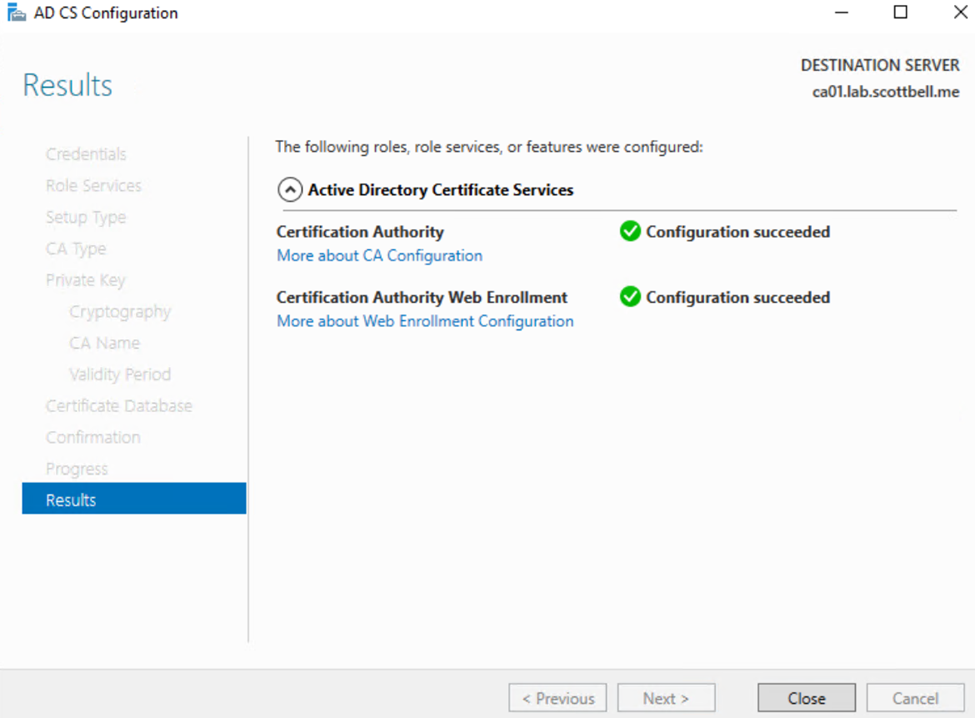
Once complete, select Close
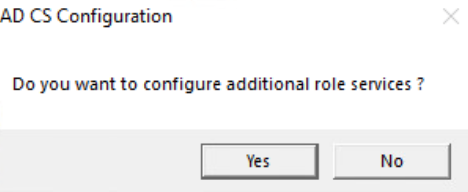
Select Yes
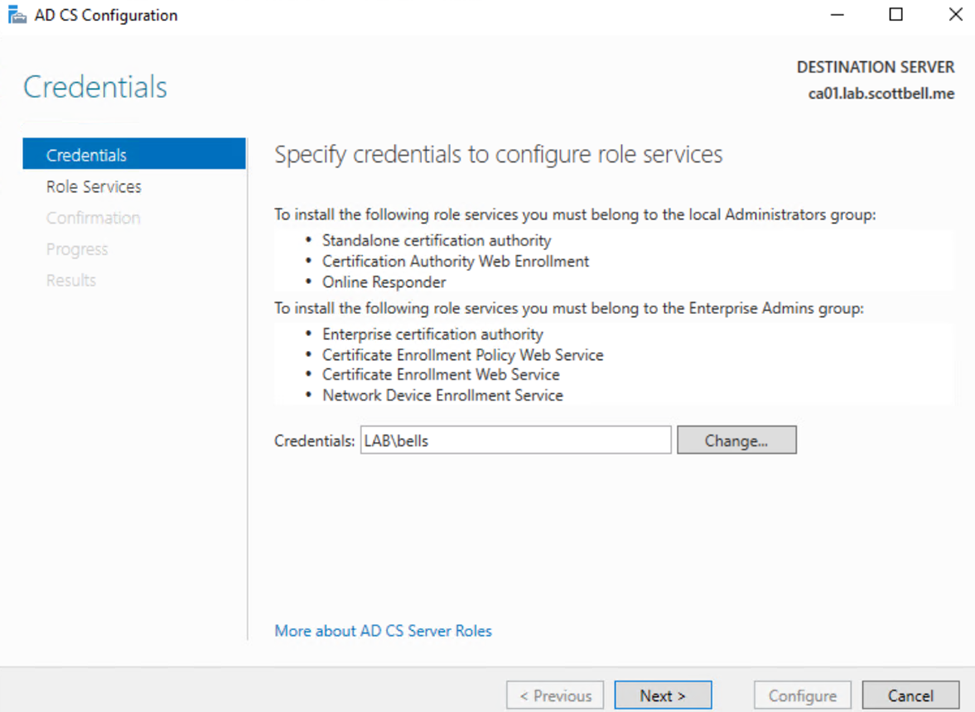
Same thing, change account if needed then select Next
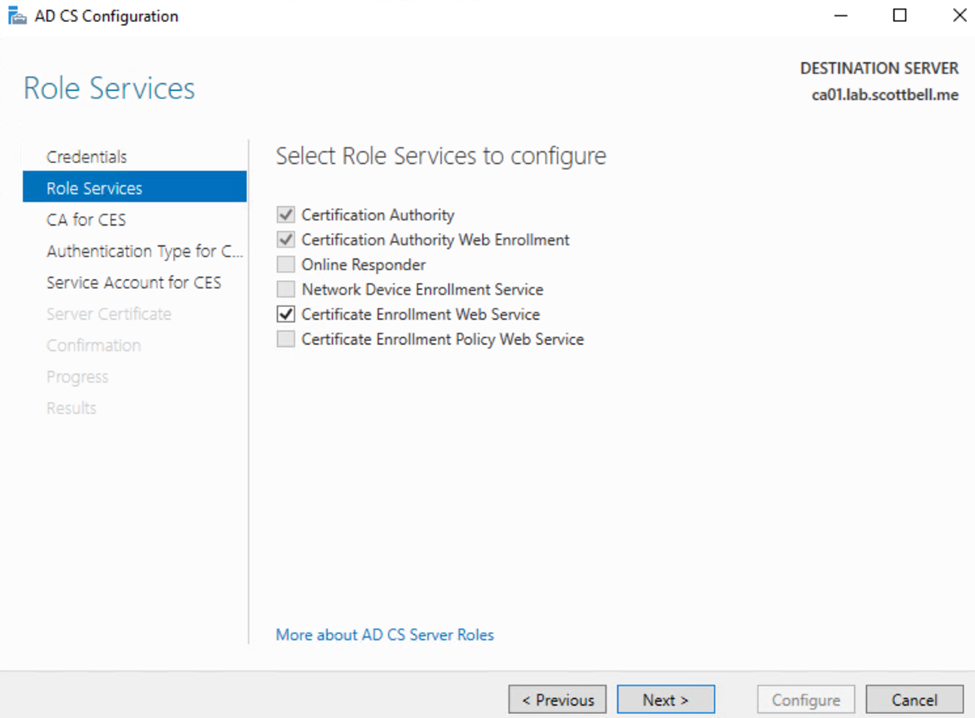
Select Certificate Enrollment Web Services and select Next
Select Next
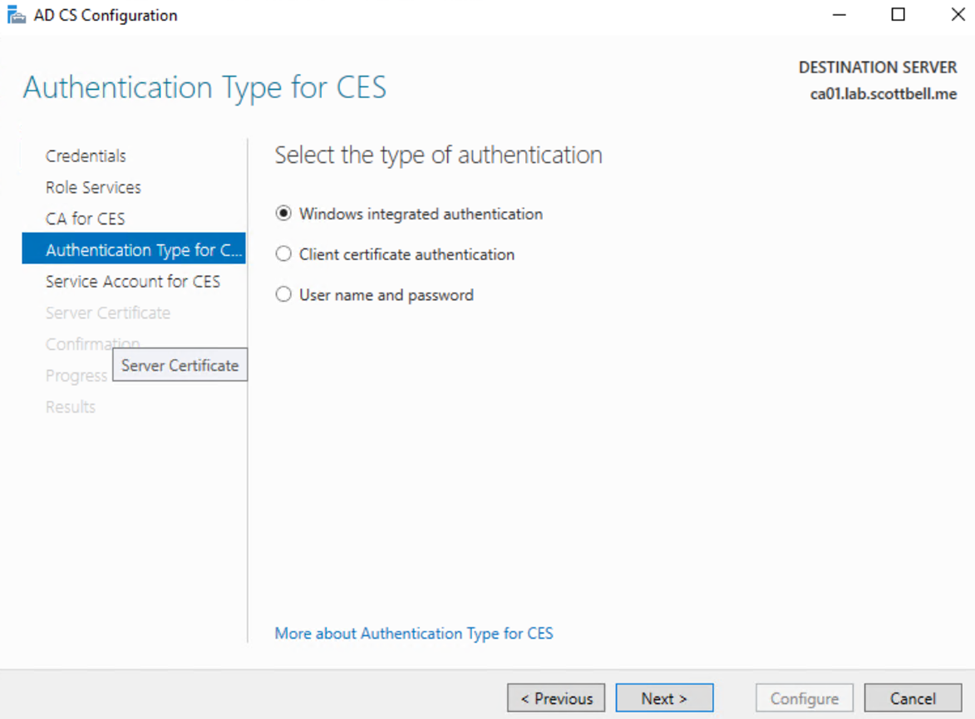
This I will leave as default for Windows integrated authentication. Select Next
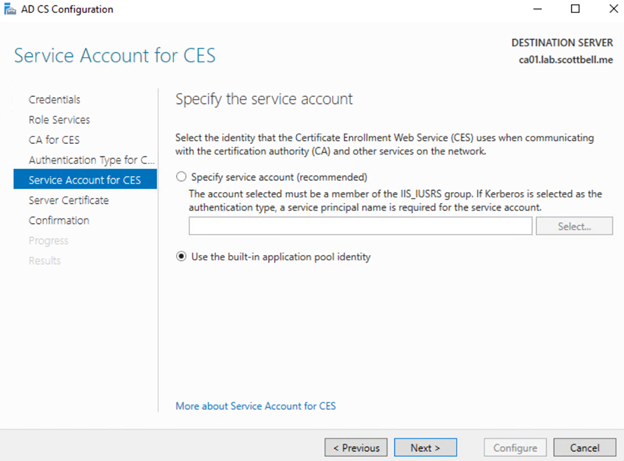
I’m not going to bother with a service account in this case and select the Use the built-in application pool identity.

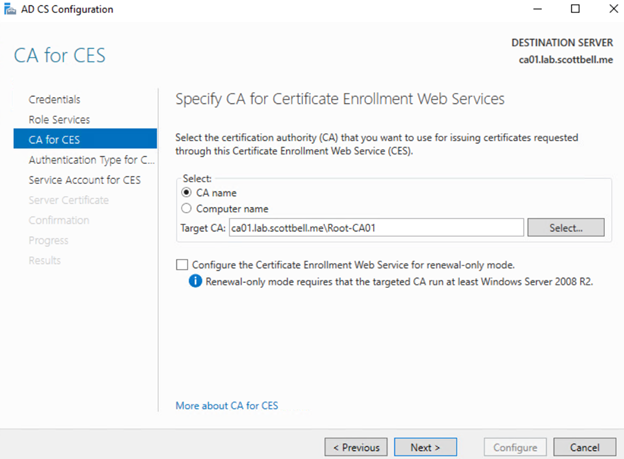
I will indeed use the Root-CA01 as the default selection here. You will need to actually select (click) on the certificate and then select Next
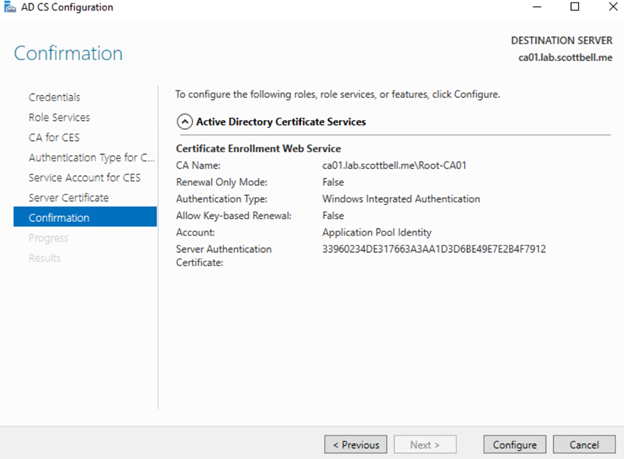
Review the options and if everything is as expected, select Configure
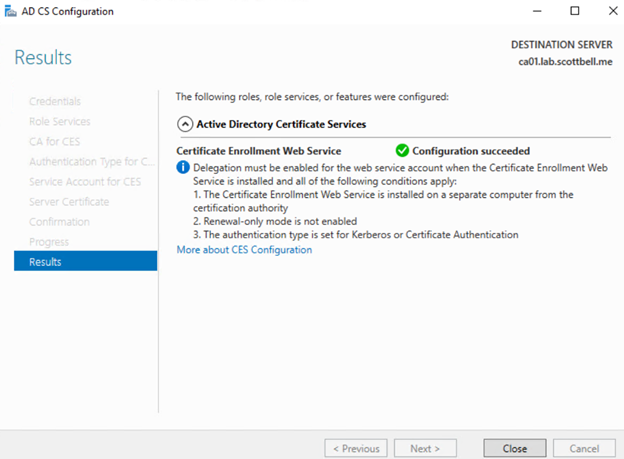
Now we are completed for this configuration. Select Close
Select Close again
Click start and type IIS, then select IIS Manager

In IIS, expand CA01, then Sites, Then Default Web Site, click CertSrv, and double-click Authentication
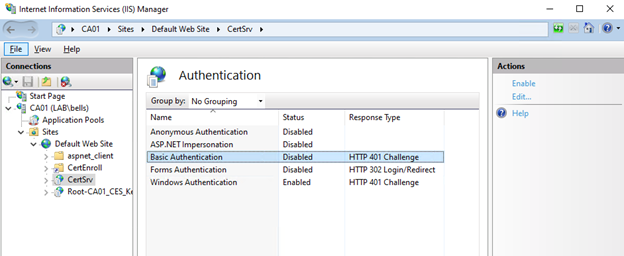
Select Basic authentication, then click Enable
Please go to part 2 for setting up an Certificate in IIS for the CA Server. Have a good day.
ADCS, Certificate Services, Home Lab, Homelab, Microsoft, Windows, WIndows Server