Greetings, today we will be configuring an ESXi 8 host after we installed it.
Configuring host from the DCUI
This will be done as a nested hypervisor instance but the steps are identical.
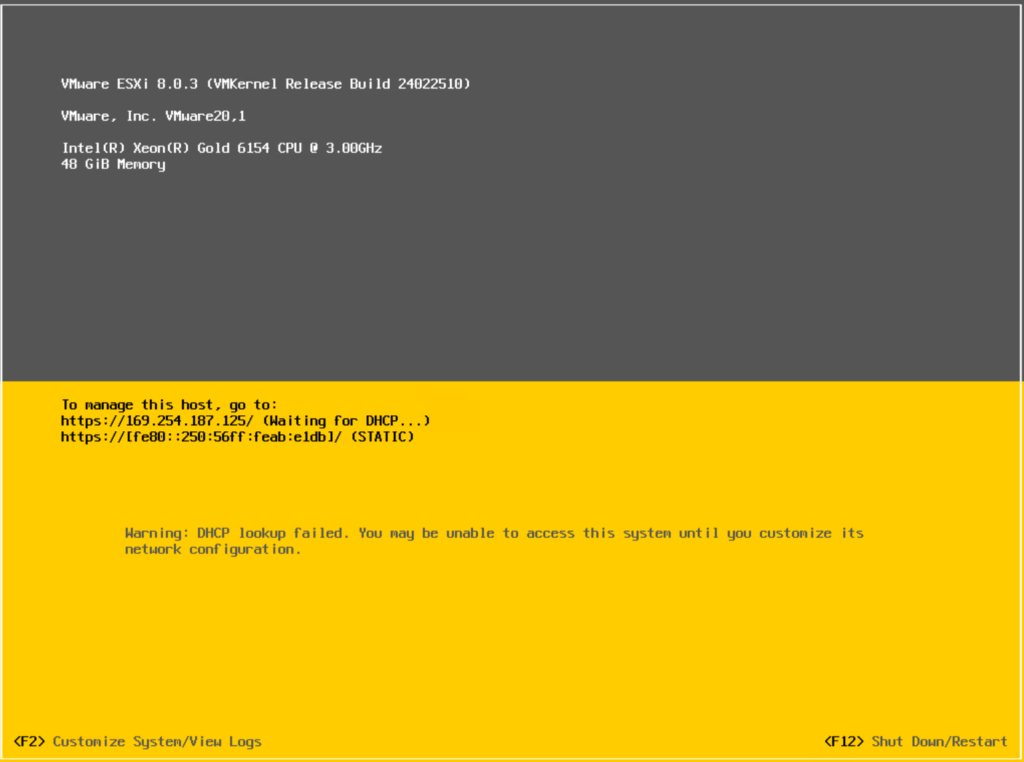
This will be your starting screen, as you can see, there is no IP or name.
Hit F2 to Customize the system
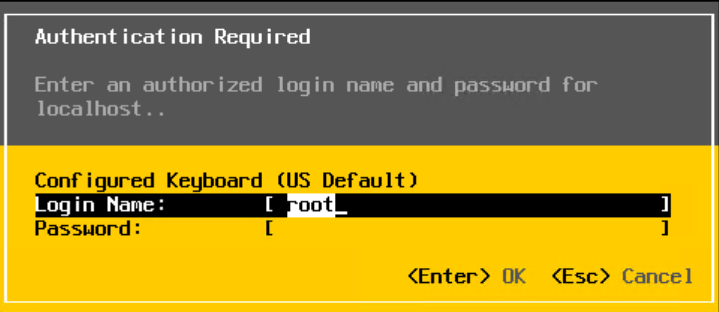
Enter the password you set when installing the hypervisor
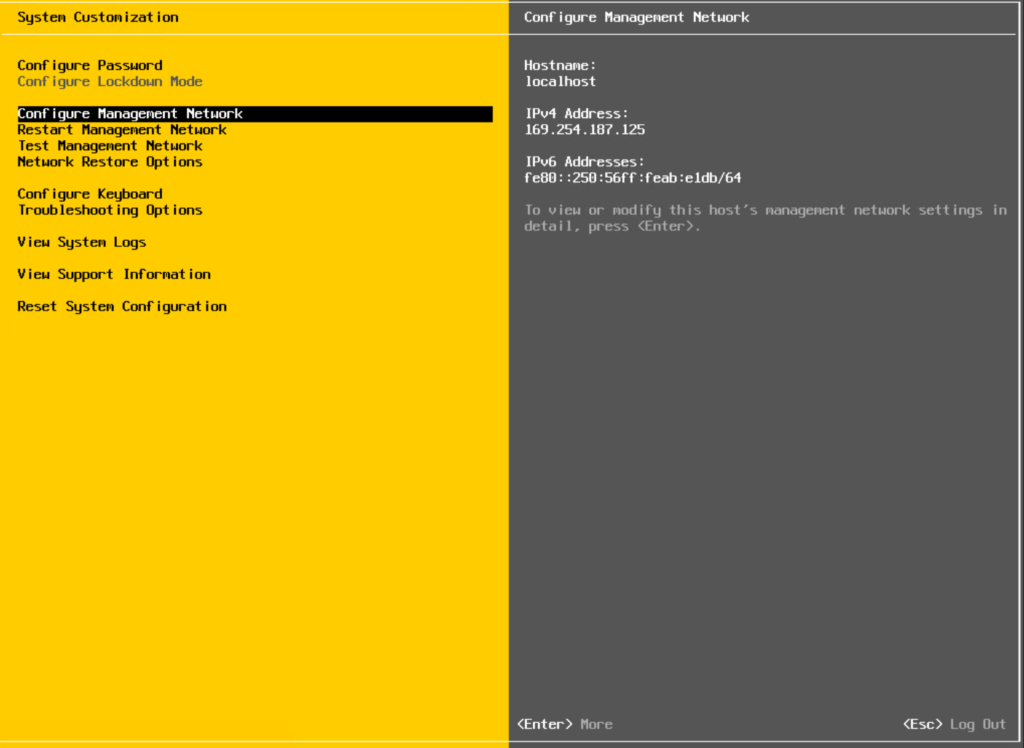
To start, Select Configure Management Network

To start, select Network Adapters if you need to change from the default one selected
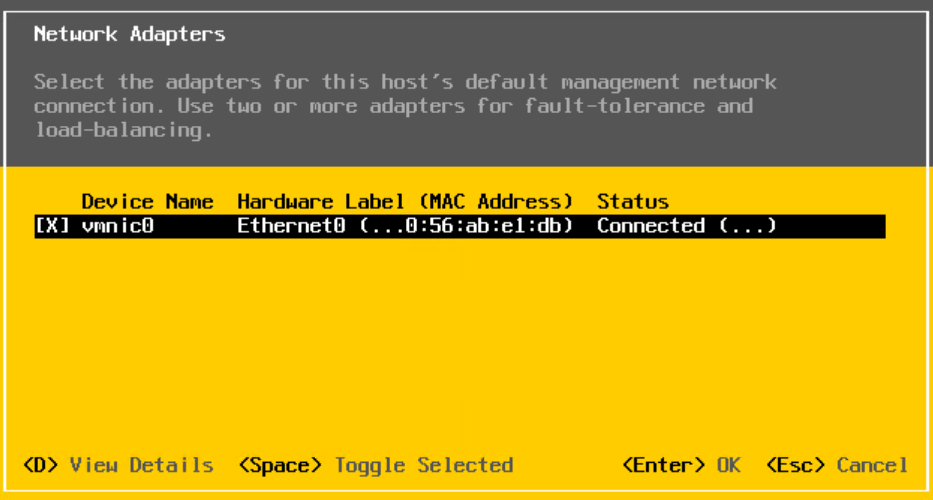
I only have one adapter so there is nothing to change in my case
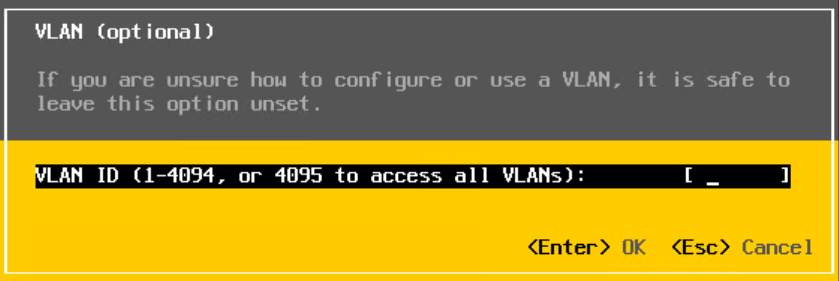
Next Select VLAN (optional) and hit enter. If you are using VLAN’s, enter the appropriate VLAN for this system and hit enter. If you arent using VLANs, leave blank and hit Esc
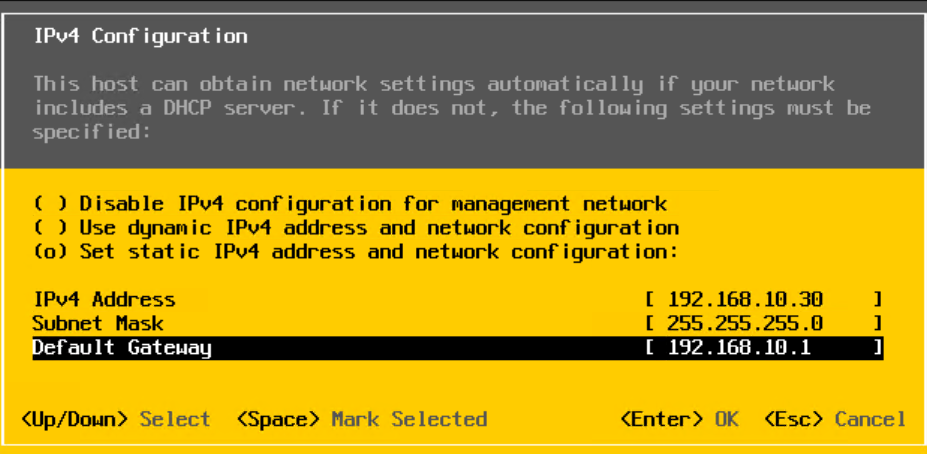
Next select IPv4 configuration and hit enter. Once in this view, select Set static IPv4 address and network configuration by highlighting the line and hitting spacebar.
Then input your IP, Subnet Mask, and Default Gateway. Hit Enter once done.
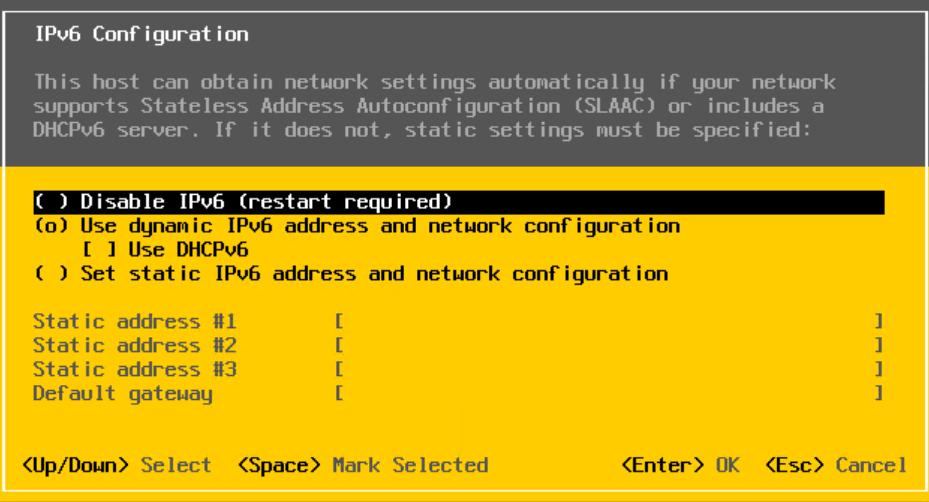
Next, if you use IPv6, select it and hit Enter. If not, skip this step. I do not use IPv6 in my lab so I will skip this step and hit Esc
Note: You can choose to disable IPv6 but this will require rebooting the host when the configuration is completed
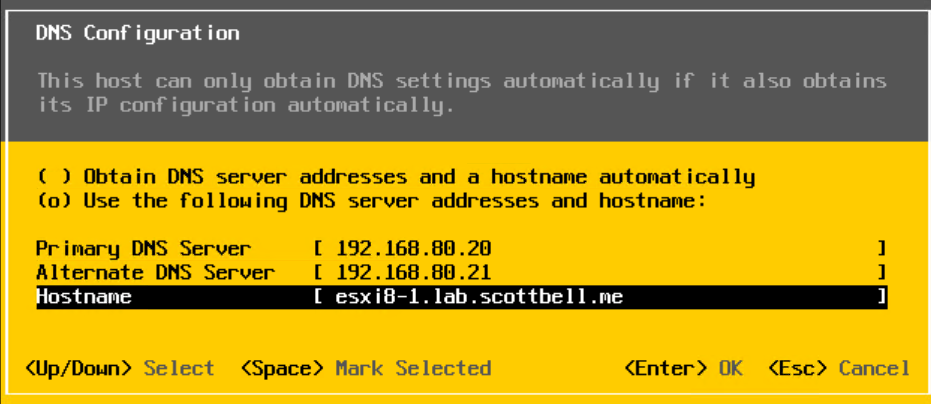
Next select DNS Configuration and hit Enter. Inside this view, highlight Use the following DNS server addresses and hostname and hit spacebar to select it. Then input your DNS server(s) and hostname.
Note: Always use the fully qualified domain name for this entry.
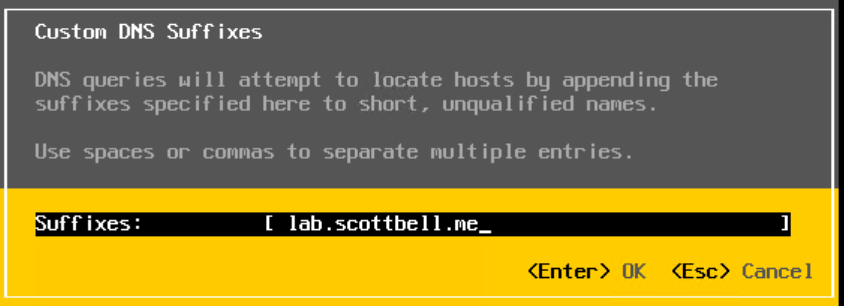
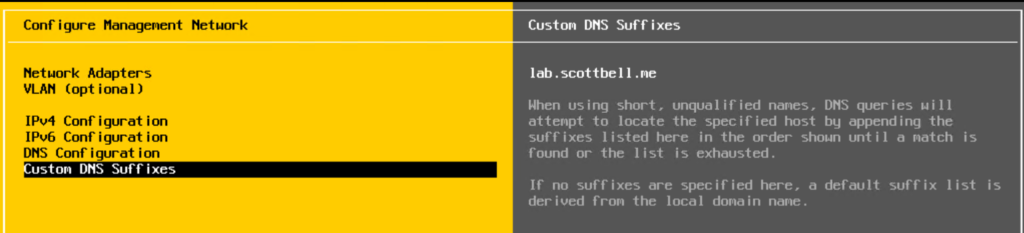
Next, select Customer DNS Suffixes and hit Enter. Enter the domain name here and hit Enter again
Once you have completed all sections, hit Esc to exit this area

You will be asked if you are sure and want to Apply changes and restart management network.
Hit Y if you are sure.
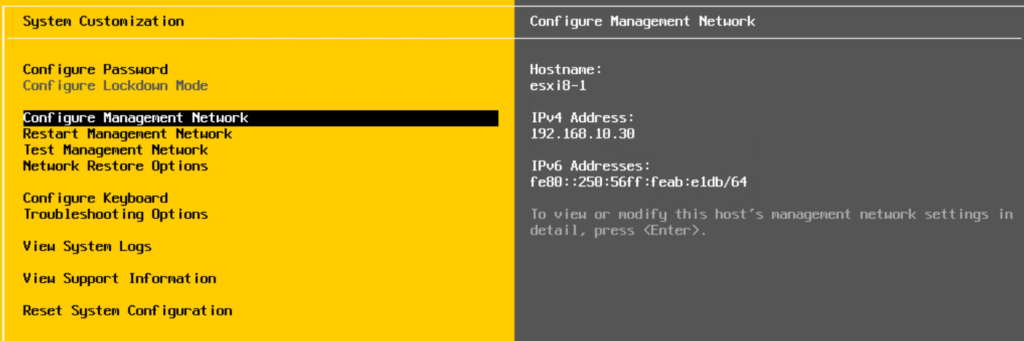
You will be brought back to the starting configuration area, you should see your newly entered information on the right side of the window
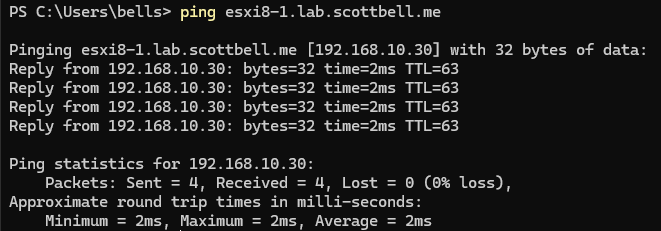
You should now be able to ping the host.
Configuring host from WebUI
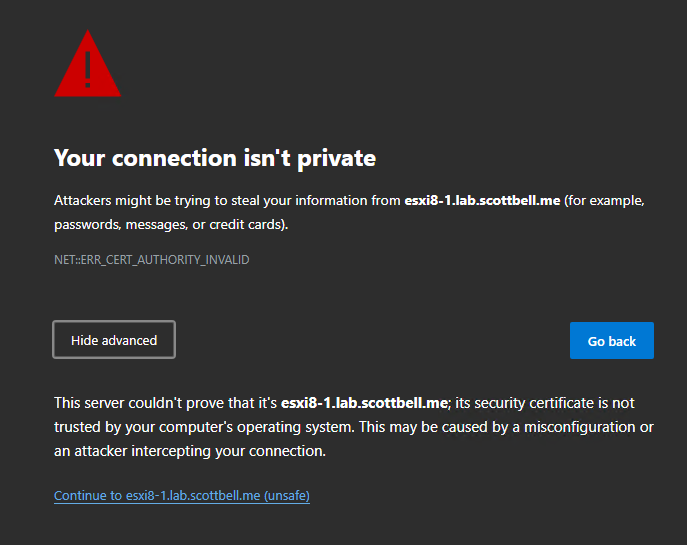
When you first navigate to the webpage for the host, you will get a certificate alert as there is only the default self-signed certificate.
If you trust the host, go ahead and select Continue to <host> (unsafe)
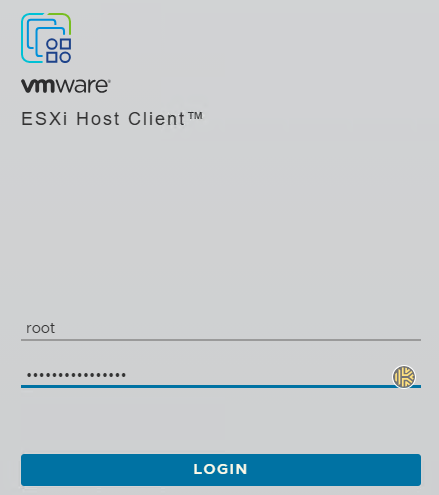
Enter the information for your root account to login
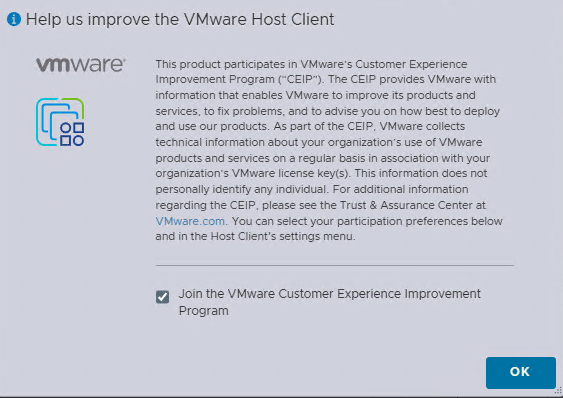
On first login, you will be asked to join the VMware Customer Experience Improvement Program. I’m ok with that for my lab so I will join the program.
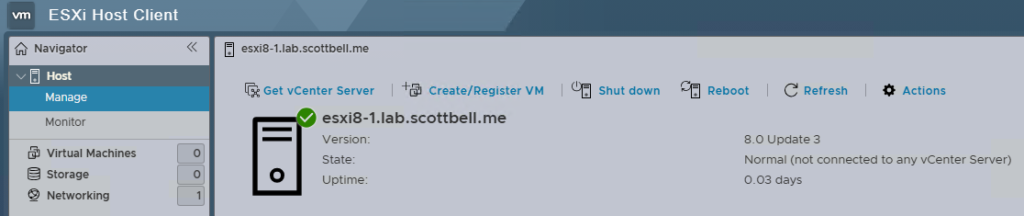
Select Manage on the left side pane
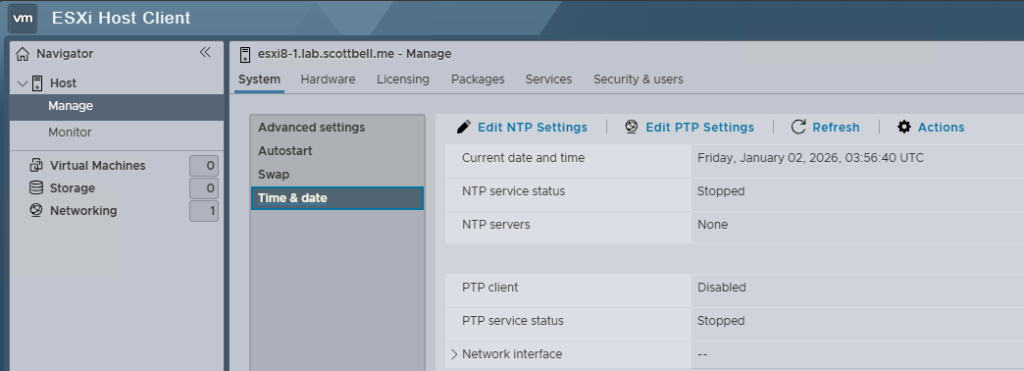
The first item we will set up is Time & Date in the center pane. Select Edit NTP settings

Select Use Network Time Protocol (enable NTP client), then change NTP service startup policy to Start and stop with host, and then enter the NTP server(s) you will be using. Then click Save

Next select Services from the top menu, then find and select “ntpd”.
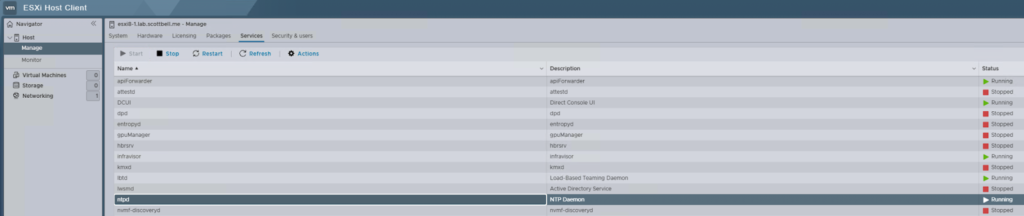
Click Start to start the service. It should show a status of Running afterwards

Next go to Security & users on the top menu, then select Certificates from the center pane, then select Import new certificate
Note: The cert info shown is what the self signed, not properly named certificate will show
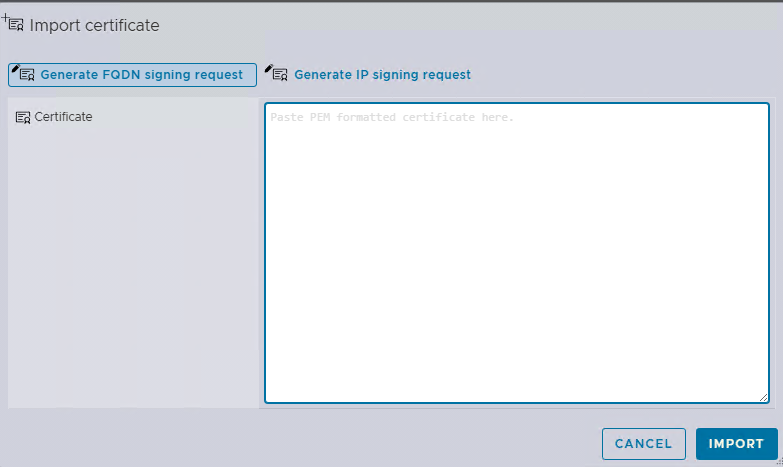
Select Generate FQDN signing request
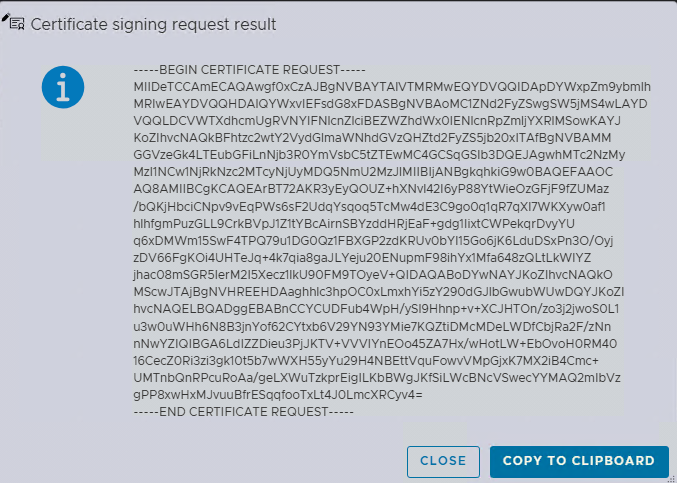
You will then get the Certificate Signing Request (CSR) resulting output, this is based off the previously entered information in the DCUI. Select Copy to clipboard.
Note: If you need to provide this to someone else or there is a delay, copy this into notepad or your preferred product to pass the info along.
Go to your certificate authority. In this case, I am using a Windows Certificate Authority.
Select Request a certificate
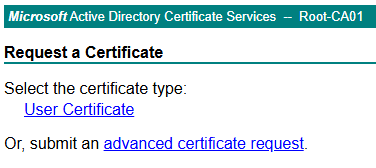
Select advanced certificate request
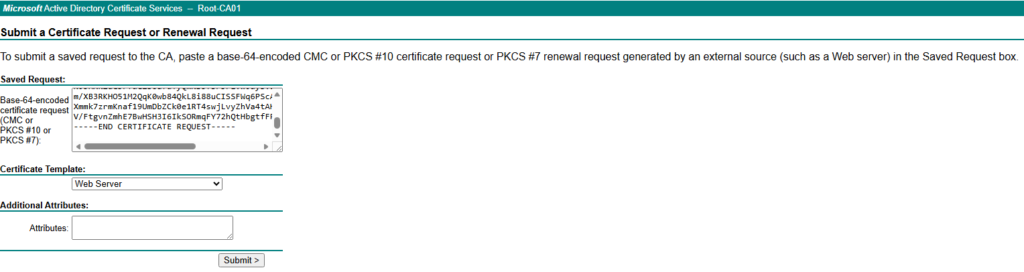
Paste the CSR into the Saved Request field
Under the Certificate Template section, change the certificate template to your VMware certificate template, then hit submit

Select Base 64 encoded (always assume base 64 for VMware products, if not linux in general) and download the certificate

Rename the file from .cer to .pem and then open the file. You can skip this step and select to open in notepad\notepad++ or equivalent program
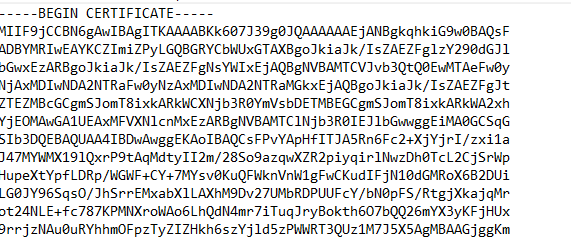
Select the contents of the file, including the Begin and End certificate lines and copy it to your clipboard
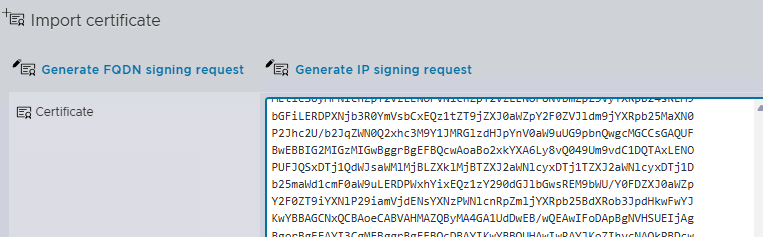
Go back to your ESXi WebUI and paste the clipboard info into the open text box. Then select Import

Note the blue banner indicating it has been successfully imported and that the browser needs to be refreshed\reloaded
Once reloading (this might require opening a new tab), you should now have a trusted host website
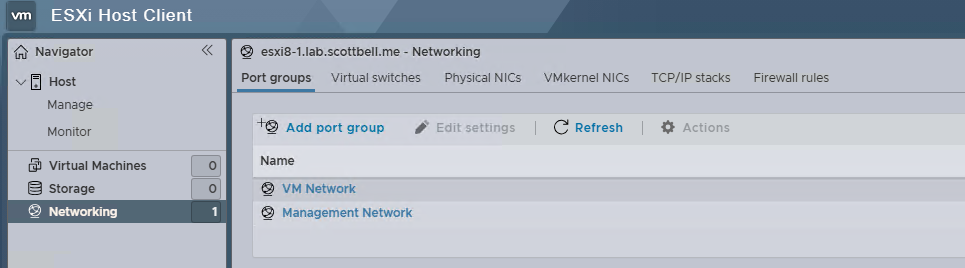
Next, go to the Networking section on the left pane
If this will be a standalone host, here is where you would add port groups for any other VLANs you might need
If your host is going to be added to a vCenter like this one will be, then you are good to now add the host into vCenter.
The next article is intended to be deployment of vCenter 8.
Have a good one.
ADCS, ESXi, ESXi 8, Home Lab, Homelab, VMware, vSphere 8